
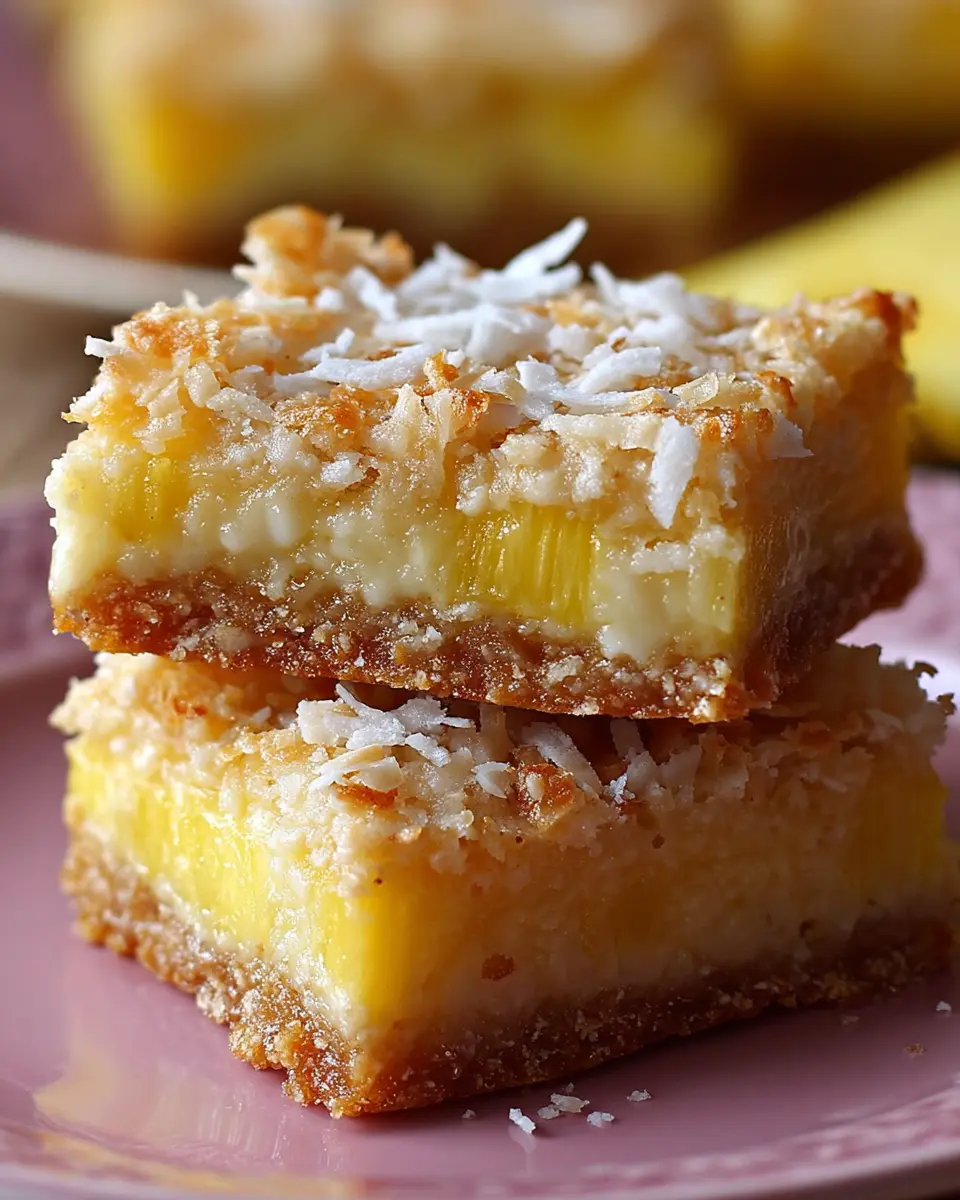
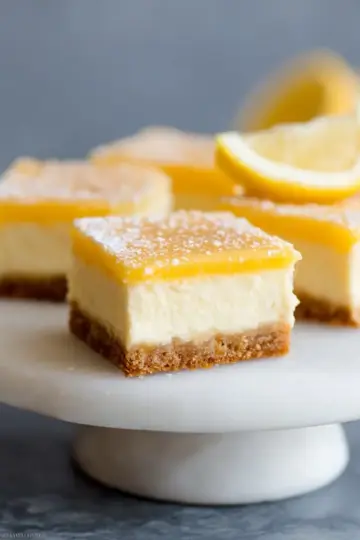
Introduction to Pineapple Bliss Bars
Are you a young professional who often finds yourself juggling a hectic schedule with cravings for something sweet? Look no further than Pineapple Bliss Bars! These delightful treats offer a perfect balance of tangy and sweet flavors that can brighten any busy day. Whether it's a mid-morning snack or a post-work reward, these bars hit the spot without requiring hours in the kitchen.
Why Pineapple Bliss Bars are a Game-Changer for Young Professionals
In today's fast-paced world, quick and satisfying recipes are essential. Pineapple Bliss Bars not only come together in under an hour but also make a batch that can last the whole week. Imagine walking into your kitchen after a long day and grabbing a sweet slice of pineapple goodness—it’s a mood-lifter like no other!
Another advantage? These bars are highly adaptable. Feel free to jazz them up with shredded coconut or a sprinkle of nuts for added texture. They’re perfect for sharing with friends or enjoying solo on a lazy Sunday. Plus, they can be refrigerated for up to five days, making them a stress-free treat.
So why not treat yourself to a little pineapple bliss? Your taste buds will thank you, and your busy lifestyle will reap the benefits of this delectable no-fuss dessert! Check out this guide for more on the health benefits of pineapple!
Ingredients for Pineapple Bliss Bars
Creating Pineapple Bliss Bars is a delicious way to indulge without spending hours in the kitchen. Let’s dive into the ingredients that will bring this tropical delight to life!
Essential ingredients for the crust
For a buttery, flaky crust, you'll need:
- 1 ½ cups all-purpose flour: This is the backbone of your crust.
- ½ cup granulated sugar: Just the right amount to sweeten without overwhelming the pineapple filling.
- ¼ teaspoon salt: A hint of salt balances the sweetness.
- ¾ cup cold unsalted butter, cubed: Using cold butter is crucial for that flaky texture.
Key ingredients for the pineapple filling
The star of the show is, of course, the filling! Gather these ingredients:
- 1 cup crushed pineapple, well-drained: To prevent sogginess, make sure they’re fully drained for tartness and flavor.
- 2 large eggs: They help bind everything together while adding richness.
- 1 cup granulated sugar: Essential for sweetness.
- ¼ cup all-purpose flour: This thickens the filling.
- ½ teaspoon baking powder: For a bit of lift.
- 1 teaspoon vanilla extract: A splash of vanilla elevates the flavor profile.
These ingredients create a delightful blend that will take your taste buds on a tropical vacation. For more culinary inspiration, consider checking out sources like The Spruce Eats for additional tips and variations. Enjoy your baking adventure!
Step-by-step Preparation of Pineapple Bliss Bars
Making Pineapple Bliss Bars can be a delightful experience, and with these straightforward steps, you’ll have a delicious treat ready to impress friends and family. Let’s dive in!
Preparing the oven and baking pan
First things first, it's time to get your kitchen prepped. Start by preheating your oven to 350°F (175°C). This ensures that your bars will bake evenly. While the oven warms up, grab a 9×13 baking pan and line it with parchment paper. This step is crucial as it makes clean-up a breeze and ensures that your bars won’t stick to the pan. If you don’t have parchment paper, make sure to grease the pan well with butter or non-stick spray.
Making the crust
Now, let’s create the base of our Pineapple Bliss Bars! In a mixing bowl, combine 1 ½ cups of all-purpose flour, ½ cup of granulated sugar, and a pinch of salt. The salt is key as it enhances the sweetness of the sugar. Next, it's time to cut in ¾ cup of cold cubed unsalted butter. You can use a pastry cutter, two forks, or your hands for this part. The goal is to achieve a crumbly texture that resembles wet sand. Once you've got that down, evenly press the mixture into your prepared baking pan.
Baking the crust to perfection
Place the crust in the preheated oven and bake for approximately 15 minutes. You want it to turn a lovely light golden color. This step locks in the flavor and gives the bars a sturdy foundation. After removing the crust, allow it to cool slightly while you prepare the luscious pineapple filling.
Preparing the pineapple filling
For the filling, you'll need to whisk together 2 large eggs and 1 cup of granulated sugar until smooth and creamy. It’s fascinating how these simple ingredients can transform into something so delightful! Once combined, gently mix in ¼ cup of all-purpose flour and ½ teaspoon of baking powder—this mix will ensure your bars rise nicely. Finish off the filling by adding in 1 teaspoon of vanilla extract and the star of the show: 1 cup of well-drained crushed pineapple. The combination of sweet pineapple and vanilla is simply irresistible!
Combining and baking the bars
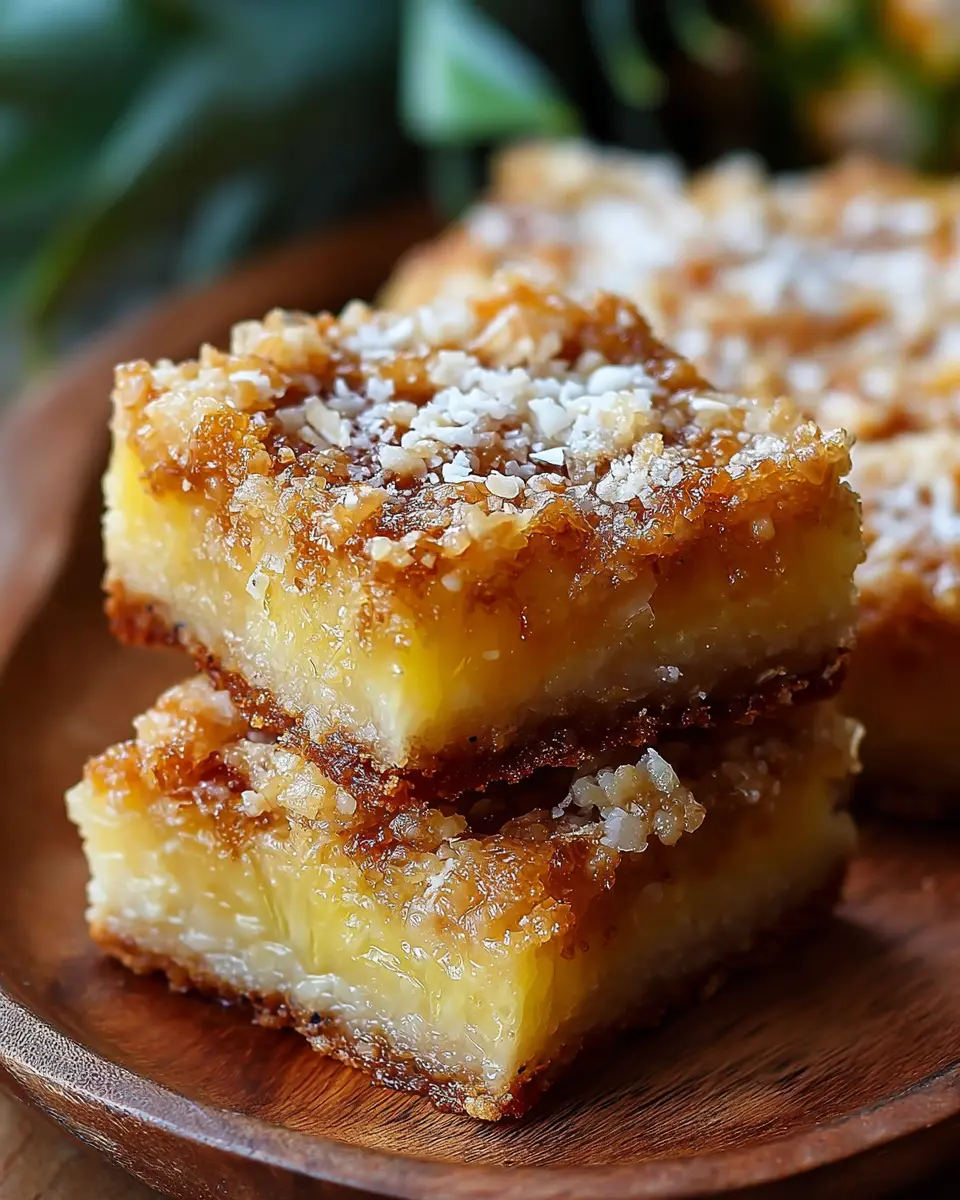
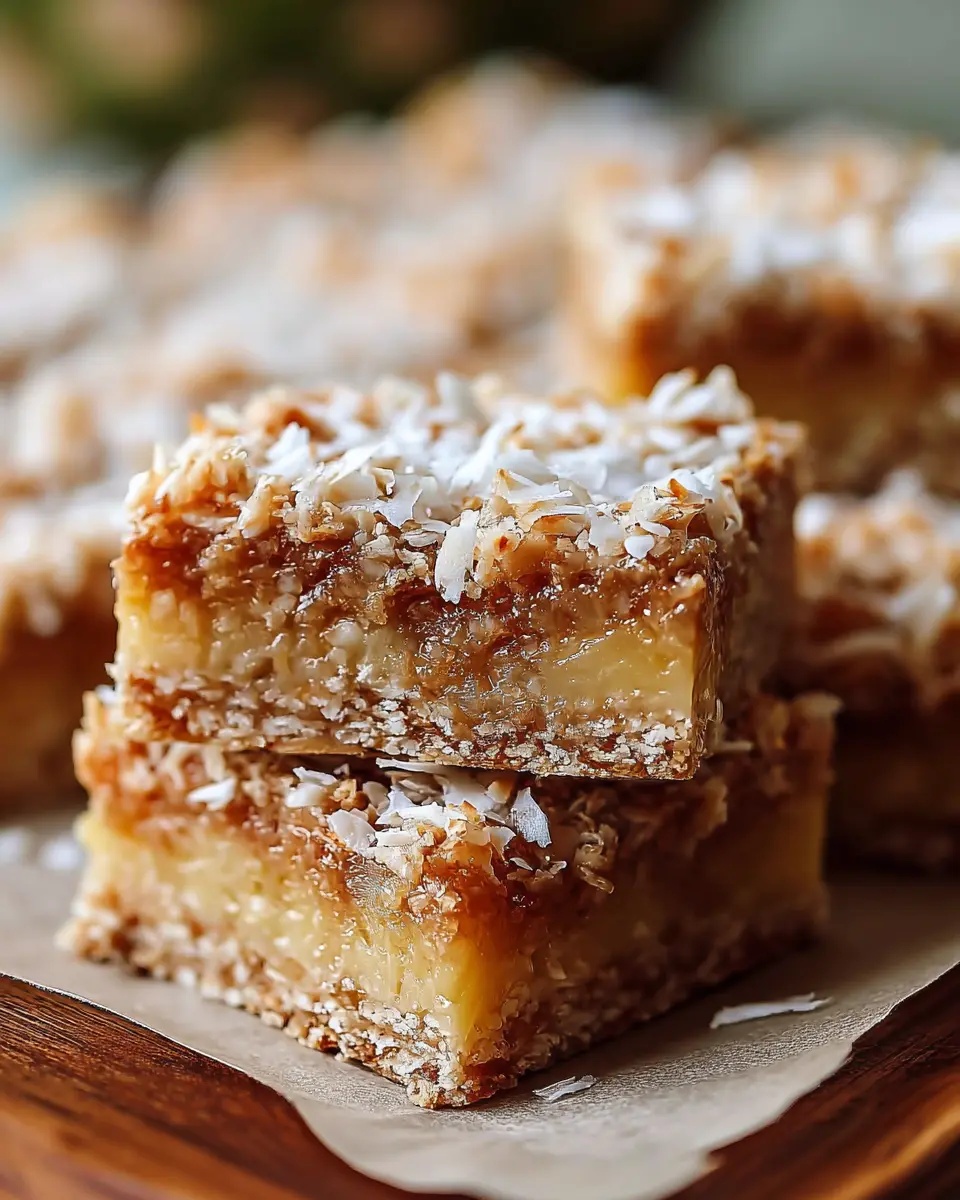
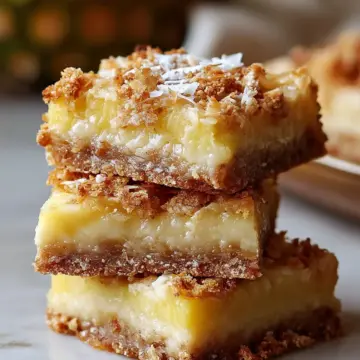
Pour the pineapple filling evenly over the slightly cooled crust. Bake the Pineapple Bliss Bars for 25 to 30 minutes, or until the edges are set. You'll want the center to have a slight jiggle—this ensures it remains creamy and sweet. Once done, allow the bars to cool completely in the pan. Dust generously with powdered sugar before slicing into squares. Have fun with this part—consider adding some toasted coconut or even fresh pineapple slices for an extra tropical touch!
By following these steps, you’re setting yourself up for a delicious pan of Pineapple Bliss Bars. It's worth noting that they can be refrigerated for up to five days, making them perfect for breakfasts or snacks. Enjoy your baking adventure!
Variations on Pineapple Bliss Bars
Tropical twist: Adding shredded coconut
Elevate your Pineapple Bliss Bars with a delightful addition of shredded coconut. Simply stir in ½ cup of unsweetened coconut flakes into your pineapple filling for that extra layer of tropical flavor. Not only does this tweak enhance the taste, but it also adds a chewy texture that perfectly balances the sweetness of the pineapple. And if you're aiming for a truly eye-catching dessert, consider topping the bars with toasted coconut before serving. You can find some excellent coconut options at Bob’s Red Mill.
Berry blast: Incorporating mixed berries
For a burst of color and flavor, think about enhancing your Pineapple Bliss Bars with mixed berries. Whether it's blueberries, raspberries, or strawberries, adding about 1 cup of fresh or frozen berries will turn your dessert into a showstopper. Just gently fold them into the pineapple mixture to create a beautiful marbled effect. This variation not only draws out vibrant flavors but creates a stunning presentation! Looking for more berry inspiration? Check out the Berry Foundation for fun facts and health benefits of your favorite fruits.
Creating variations on these bars is all about having fun and experimenting in your kitchen. Enjoy the process!
Baking Tips and Notes for Pineapple Bliss Bars
Ensuring the Perfect Crust Texture
To achieve a perfectly flaky crust for your pineapple bliss bars, make sure your butter is ice-cold. When cutting in the butter, aim for pea-sized pieces; this creates those delightful pockets of flaky goodness. Avoid overmixing the crust mixture, as it can become tough. A lightly golden bake indicates it's just right!
Key Tips for Cooling and Serving
Once your bars are baked, patience is key! Allow them to cool completely in the pan; this helps the texture set. When ready to serve, dust with powdered sugar for that beautiful finish. These pineapple bliss bars can be garnished with fresh pineapple or coconut for an extra tropical touch. If storing, keep them in the fridge for up to five days—just remember to let them come to room temperature before indulging! For more tips on cooling baked goods, check out King Arthur Baking.
Serving Suggestions for Pineapple Bliss Bars
Complementing Flavors and Pairings
To enhance your Pineapple Bliss Bars, consider serving them with light accompaniments that harmonize beautifully. Creamy whipped cream or a scoop of vanilla ice cream can add a delightful contrast to the bars' tangy sweetness. For a tropical twist, try pairing these bars with shredded coconut or slices of fresh mango. If you love a little acidity, a drizzle of lime juice can provide a refreshing balance. Serve with a warm cup of chamomile tea or a chilled coconut water for a truly blissful experience.
Presentation Ideas for Gatherings
When hosting friends, the way you present your Pineapple Bliss Bars can elevate the whole event. Arrange the bars on a decorative platter and dust them with powdered sugar for a snowy finish. Consider garnishing each bar with a slice of pineapple or a sprinkle of toasted coconut for visual appeal. If you want to share the flavor adventure, create a tropical dessert bar by complementing the bars with fresh fruit, chocolate dipping sauces, and tropical-themed decor. It’s simple, inviting, and sure to be a hit!
By embracing these ideas, you'll not only make your Pineapple Bliss Bars a delightful treat but also a beautiful centerpiece for any occasion. Looking for more inspiration? Check out this guide on how to create stunning dessert presentations.
Time Breakdown for Pineapple Bliss Bars
Preparation Time
Getting started on your Pineapple Bliss Bars is simple! You’ll need about 10-15 minutes to gather your ingredients, preheat your oven, and prepare your baking pan. This is the perfect time to get your kitchen smelling tropical!
Baking Time
Once you’ve assembled the crust and filling, it’s time for the magical baking moment. The crust needs 15 minutes to bake, followed by an additional 25-30 minutes for the filling. That’s a total of about 40-45 minutes in the oven, filling your home with delicious aromas.
Total Time
In total, you should set aside around 1 hour to 1 hour and 15 minutes for the entire process, including preparation and baking. Once they cool, don’t forget to dust those Pineapple Bliss Bars with powdered sugar for that finishing touch!
Feel free to explore more cooking tips and tropical ingredient ideas on Bon Appétit or Food52 as you master this delightful recipe.
Nutritional Facts for Pineapple Bliss Bars
Calories
Indulging in Pineapple Bliss Bars? Each serving contains approximately 200 calories. This makes them a delightful yet manageable treat for those sweet cravings that strike during your afternoon slump.
Sugar Content
With a total sugar content of about 14 grams per bar, these bars combine natural sweetness from the crushed pineapple with sugar in the batter. If you’re mindful of sugar intake, consider these a dessert to enjoy on special occasions.
Dietary Considerations
If you’re interested in making Pineapple Bliss Bars more accommodating for different dietary needs, they can easily be tweaked! Substitute the all-purpose flour for a gluten-free blend, or use a sugar alternative to reduce caloric content. Remember, these delightful treats can be stored in the fridge for up to five days, allowing you to savor the taste of summer anytime.
For more nutritional insights, check out articles from the USDA or Healthline.
Take full advantage of this easy-to-make recipe while balancing your dietary choices!
FAQs about Pineapple Bliss Bars
Can I use fresh pineapple instead of canned?
Absolutely! Using fresh pineapple will elevate the flavor of your Pineapple Bliss Bars. Just be sure to finely chop or crush the pineapple and drain any excess juice to avoid a soggy filling. Fresh fruit will bring a vibrant taste, making your bars feel even more tropical and delicious.
How do I store leftover Pineapple Bliss Bars?
To keep your Pineapple Bliss Bars fresh, store them covered in an airtight container in the refrigerator. They can last for up to five days, making them a great treat to have on hand. Just allow them to come to room temperature before serving for the best texture!
Can I make these bars dairy-free?
Yes, indeed! To whip up dairy-free Pineapple Bliss Bars, simply substitute the cold unsalted butter with a vegan alternative, such as coconut oil or vegan butter. This adjustment won’t compromise the deliciousness of your bars, ensuring everyone can enjoy this tropical delight. For more tips on dairy alternatives, you might find resources from The Dairy Alliance helpful.
Feel free to drop more questions in the comments section—I'm here to help!
Conclusion on Pineapple Bliss Bars
The perfect homemade treat for busy professionals!
In conclusion, Pineapple Bliss Bars are the ideal solution for busy professionals craving a quick yet indulgent snack. With minimal prep and delightful flavors, these bars can easily brighten your afternoon. Keep a batch in the fridge for a satisfying treat that inspires tropical vibes anytime! Try making them today and enjoy a little slice of paradise.
Pineapple Bliss Bars
Equipment
- 9'x13' baking pan
- mixing bowl
- Whisk
Ingredients
Crust
- 1.5 cups all-purpose flour
- 0.5 cups granulated sugar
- 0.25 teaspoon salt
- 0.75 cups cold unsalted butter cubed
Filling
- 1 cups crushed pineapple well-drained
- 2 large eggs
- 1 cups granulated sugar
- 0.25 cups all-purpose flour
- 0.5 teaspoon baking powder
- 1 teaspoon vanilla extract
- powdered sugar for dusting
Instructions
Preparation
- Preheat oven to 350°F and line a 9×13 baking pan with parchment paper.
- Make the crust: In a bowl, mix together 1 ½ cups flour, ½ cup sugar and salt. Cut in cold butter until crumbly. Press evenly into the prepared pan.
- Bake crust for 15 minutes until lightly golden. Allow to cool slightly.
- Make the pineapple filling: In a bowl, whisk the eggs and 1 cup sugar until smooth. Mix in ¼ cup flour, baking powder and vanilla. Fold in the drained crushed pineapple.
- Pour the pineapple filling evenly over the crust. Bake for 25-30 minutes until set on the edges.
- Allow bars to cool completely in pan. Once cooled, dust generously with powdered sugar before slicing into squares.

Leave a Reply