
Introduction to Grilled Cheese Roll Ups
Why Grilled Cheese Roll Ups are a Game-Changer
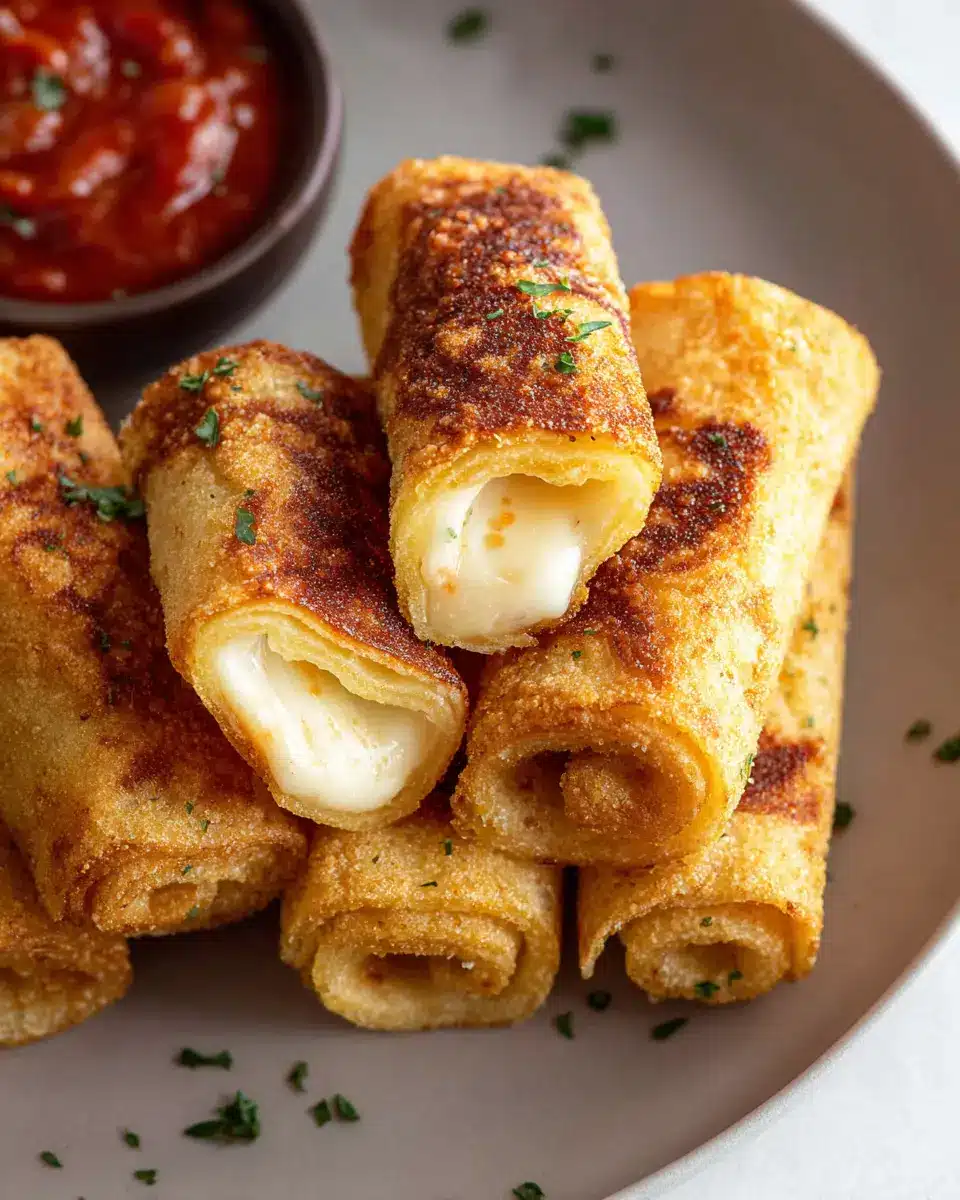
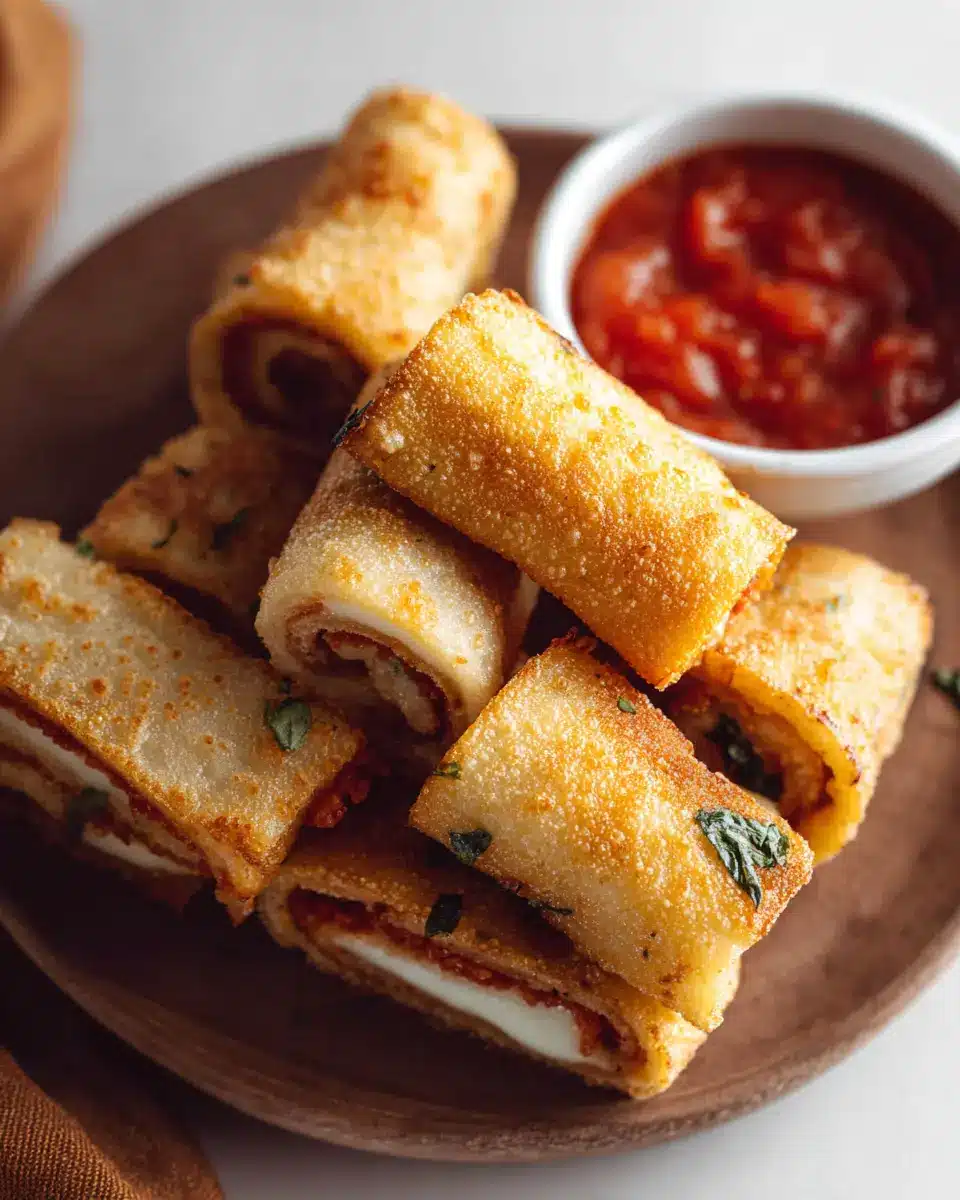
If you thought the classic grilled cheese sandwich couldn’t get any better, let me introduce you to the delightful world of Grilled Cheese Roll Ups. These fun, bite-sized snacks take everything we love about the traditional sandwich and wrap it up in an exciting, dippable format. Picture this: melty cheese beautifully rolled up in soft bread, perfect for scooping into your favorite marinara sauce, hearty tomato soup, or a zesty ranch dressing. Talk about comfort food at its finest!
But why are these roll ups such a game-changer? For starters, they are incredibly quick to make! With just 15 minutes of preparation and another 5 for cooking, you have an impressive dish that’s perfect for busy weeknights or a laid-back weekend gathering. Plus, they’re easy to customize — throw in some Turkey Bacon or Chicken Ham for extra protein, or add your favorite veggies to ramp up the flavor.
These Grilled Cheese Roll Ups are not only delicious; they also elevate casual snacking to a whole new level. So gather your ingredients, and let’s dive into this creative twist on a beloved classic!

Ingredients for Grilled Cheese Roll Ups
Essential ingredients for flavor and texture
To make the perfect Grilled Cheese Roll Ups, you'll want to gather a few essential ingredients that ensure both flavor and texture. Here’s what you need:
- Soft White Bread: 8 slices. Choose a fresh, soft variety for easy rolling and a delightful crispy bite once grilled.
- Cheddar Cheese: 1 cup shredded. This classic cheese melts beautifully and gives a rich flavor. Feel free to mix in some mozzarella for extra gooeyness!
- Butter: 6 tablespoons, divided. Using butter enhances that golden, crispy exterior you crave.
These fundamental ingredients create a delicious blend of textures—crispy on the outside and ooey-gooey on the inside—that will have you coming back for more.
Optional dippables to elevate your meal
While your Grilled Cheese Roll Ups are delicious on their own, adding a few dippables can take the experience to the next level:
- Marinara Sauce: A tangy tomato dip that adds a lovely contrast.
- Tomato Soup: Classic comfort food—perfect for dunking!
- Ranch Dressing: For a creamy, herby kick.
Experiment with your favorites, and don’t be afraid to explore other dips too!
Step-by-Step Preparation of Grilled Cheese Roll Ups
Making Grilled Cheese Roll Ups is not only a delightful culinary adventure but also an opportunity to impress your friends with a dish that marries comfort food with creativity. Let's dive into the steps to whip up these cheesy treats!
Gather your ingredients
Before you get started, it's essential to have all your ingredients ready. You'll need:
- 8 slices of soft white bread
- 1 cup of shredded cheddar cheese (feel free to experiment with other favorites!)
- 6 tablespoons of butter, divided
- Dipping sauce: marinara sauce, tomato soup, or ranch dressing work beautifully.
Having everything prepared means smoother sailing in the kitchen. Plus, it’s just more fun to have your workstation organized!
Trim and roll the bread slices
The first step in creating your Grilled Cheese Roll Ups is to trim the crusts from each slice of bread. Once that’s done, it’s time to roll! Using a rolling pin, flatten each slice of trimmed bread to about ⅛-inch thickness. This makes it easier to roll everything up tightly later. Rolling the bread creates a softer, more delicate texture that you'll appreciate while indulging in this treat.
Add the cheese and roll up tightly
Now comes the cheesy part! Take about 2 tablespoons of shredded cheese and sprinkle it generously onto the rolled-out slice. When you're happy with the cheese distribution, roll the bread up tightly. Make sure the cheese is securely tucked inside to prevent any melty goodness from escaping during cooking. Repeat this process with the remaining slices—trust me, the repetition will only build your excitement!
Melt butter and prepare the pan
Next, it's time to melt the butter. In a large non-stick sauté pan, add 2 tablespoons of butter and set the heat to medium. While that's melting, you can also melt the remaining 4 tablespoons of butter in a shallow bowl in the microwave. This will be used for dipping the roll ups before cooking.
Sauté until golden and crispy
With your pan ready and rolls prepared, dip each roll-up into the melted butter. Carefully place them into the sauté pan. Sauté each roll up for about 1-2 minutes per side, or until they turn a beautiful golden brown and crispy on the outside. The aroma filling your kitchen will be irresistible! Once cooked, remove them to a serving platter.
Serve your delectable Grilled Cheese Roll Ups with a warm dipping sauce—whether it's marinara, tomato soup, or ranch dressing, it elevates the experience. Enjoy every gooey bite!
By following these steps, you'll have a gorgeous plate of Grilled Cheese Roll Ups ready in no time. Happy cooking!
Variations on Grilled Cheese Roll Ups
Grilled Cheese Roll Ups with Turkey Bacon
Elevate your Grilled Cheese Roll Ups with the savory crunch of turkey bacon. Simply add a strip of crispy turkey bacon to the cheese before rolling up your bread. The smoky flavor complements the creamy cheese beautifully, making each bite a bit more indulgent. If you're looking for a classic combo, pair these with a tangy ranch dressing for dipping.
Grilled Cheese Roll Ups with Chicken Ham
For a heartier version, try adding slices of chicken ham to your Grilled Cheese Roll Ups. These tender slices boost the protein content while adding a deliciously savory kick. Just like with the turkey bacon variation, these roll ups pair perfectly with your favorite dipping sauce, like marinara or a warm tomato soup—perfect for a cozy night in!
Experimenting with these variations allows you to create a delightful twist on a classic dish. Have you tried any other combinations?
Cooking Tips and Notes for Grilled Cheese Roll Ups
Choosing the Right Bread
When it comes to making Grilled Cheese Roll Ups, the type of bread you select can make all the difference. Opt for soft white bread, as it rolls easily without tearing. Alternatively, a sourdough or whole wheat option can add a unique flavor and texture. Just be sure it’s fresh to ensure easy rolling and a delightful crispiness when cooked.
Tips for Perfect Rolling
For those perfect rolls, use a rolling pin to flatten the bread to about ⅛-inch thickness. This not only helps with the rolling but also ensures an even distribution of cheese as it melts. Keep your filling generous but not overwhelming—about 2 tablespoons of cheese works beautifully. And don’t forget to roll tightly! A snug roll prevents the cheese from escaping during cooking, ensuring each bite is packed with melty goodness.
For more information on bread types and their uses, you can check out The Kitchn. For rolling techniques, Serious Eats offers some fantastic insights!
Serving Suggestions for Grilled Cheese Roll Ups
Best dips to serve alongside
When it comes to enjoying your Grilled Cheese Roll Ups, dipping sauces elevate the experience! Classic options like marinara sauce or ranch dressing bring a delightful twist. For something warm and comforting, try pairing them with creamy tomato soup—it’s like a nostalgic hug for your taste buds. Feeling adventurous? A zesty sriracha mayo can add an exciting kick. The right dip can make each bite an indulgent treat.
Pairing with soups for a comforting meal
Looking for a cozy meal? Pair your Grilled Cheese Roll Ups with a hot bowl of tomato basil soup or butternut squash soup for a deliciously comforting experience. These soups not only complement the cheesy goodness but also create a balanced meal. Each creamy sip combined with your crispy roll ups will leave you feeling warm and satisfied, making it a perfect option for chilly evenings or quick lunch breaks. Check out more pairing ideas at EatingWell.
Time Breakdown for Grilled Cheese Roll Ups
Preparation time
Getting started on these delicious Grilled Cheese Roll Ups takes just 15 minutes. It’s quick enough to fit into your busy day, so there’s no excuse not to whip them up!
Cooking time
The cooking part is even quicker, taking about 5 minutes. You’ll be savoring these crispy rolls in no time.
Total time
In just 20 minutes, you can prepare and cook a delightful batch of Grilled Cheese Roll Ups. Perfect for a quick lunch or a cozy dinner!
Nutritional Facts for Grilled Cheese Roll Ups
When it comes to Grilled Cheese Roll Ups, knowing the nutritional breakdown can help you enjoy them guilt-free. Here’s a quick glance at their stats:
Calories
Each roll up contains about 150 calories, making it a delicious yet manageable snack or meal option.
Protein
With approximately 5 grams of protein per roll up, these cheesy delights provide a satisfying boost to your daily intake.
Sodium
Keep an eye on sodium content, as one roll up has around 300 mg of sodium. Enjoy in moderation, especially if you're watching your salt intake.
These delightful bites not only satisfy your cravings but can also be tailored to fit dietary needs—consider using whole-grain bread or low-sodium cheese for a healthier twist! If you're interested in more nutritional insights, check out sources like the USDA FoodData Central. Happy cooking!
FAQ about Grilled Cheese Roll Ups
Can I make these in advance?
Absolutely! You can prepare the Grilled Cheese Roll Ups in advance and keep them in the refrigerator for a few hours before cooking. Just be sure to store them in an airtight container to maintain freshness. When you're ready to enjoy them, a quick sauté in the pan will bring them back to life!
What cheese works best for Grilled Cheese Roll Ups?
While cheddar is a classic choice in our recipe, feel free to explore other options! American cheese provides that gooey melt, while mozzarella will give a delightful stretch. For something a bit fancier, try brie or gouda. Mixing cheeses can also add depth to the flavor. What's your favorite cheese combo?
Are there gluten-free options for the bread?
Definitely! There are plenty of gluten-free bread options available today that will work perfectly for Grilled Cheese Roll Ups. Look for brands like Udi’s or Canyon Bakehouse, which offer good texture and taste. Just ensure they're sliced thinly for optimal rolling. Enjoy your meal without any worries!
Conclusion on Grilled Cheese Roll Ups
Grilled Cheese Roll Ups are not just a nostalgic treat but a fun, modern twist on a classic favorite. Perfectly crispy on the outside and gooey inside, they make an excellent snack or meal. Enjoy them alone or with your favorite dipping sauce for a delightful experience!

Grilled Cheese Roll Ups
Equipment
- rolling pin
- Large non-stick saute pan
- Shallow bowl
- microwave
Ingredients
Bread and Cheese
- 8 slices soft white bread
- 1 cup shredded cheddar cheese
- 6 tablespoons butter divided
- marinara sauce, tomato soup or ranch dressing for dipping, if desired
Instructions
Preparation
- Trim the crusts from each slice of bread. Roll one slice out to about ⅛-inch thickness with a rolling pin. Sprinkle the rolled out slice with about 2 tablespoons shredded cheese. Roll up tightly. Repeat with remaining bread slices and shredded cheese.
- Place 2 tablespoons butter in a large non-stick saute pan and melt over medium heat.
- Melt remaining 4 tablespoons butter in a shallow bowl in the microwave. Dip one roll up at a time in the melted butter in the shallow bowl and then transfer to the saute pan. Allow roll ups to saute for 1-2 minutes per side until golden brown and buttery crisp on the outside. Remove to a serving platter.
- Serve with tomato sauce, tomato soup or ranch dressing for dipping, if desired.


Leave a Reply