
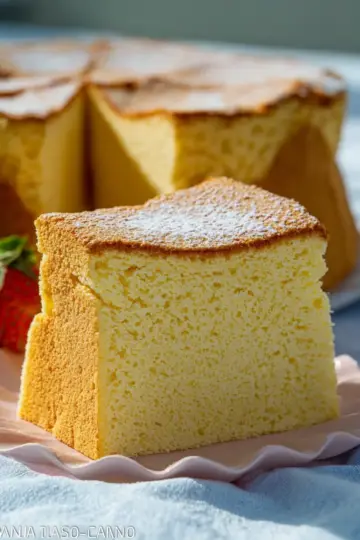
Introduction to Banana Pudding Cheesecake
Why Banana Pudding Cheesecake is a Game-Changer
If you’ve ever had the creamy, dreamy experience of digging into banana pudding, imagine taking that classic dessert and transforming it into a cheesecake! Enter the banana pudding cheesecake, a delightful fusion that not only captures the essence of the original but elevates it to a whole new level of indulgence.
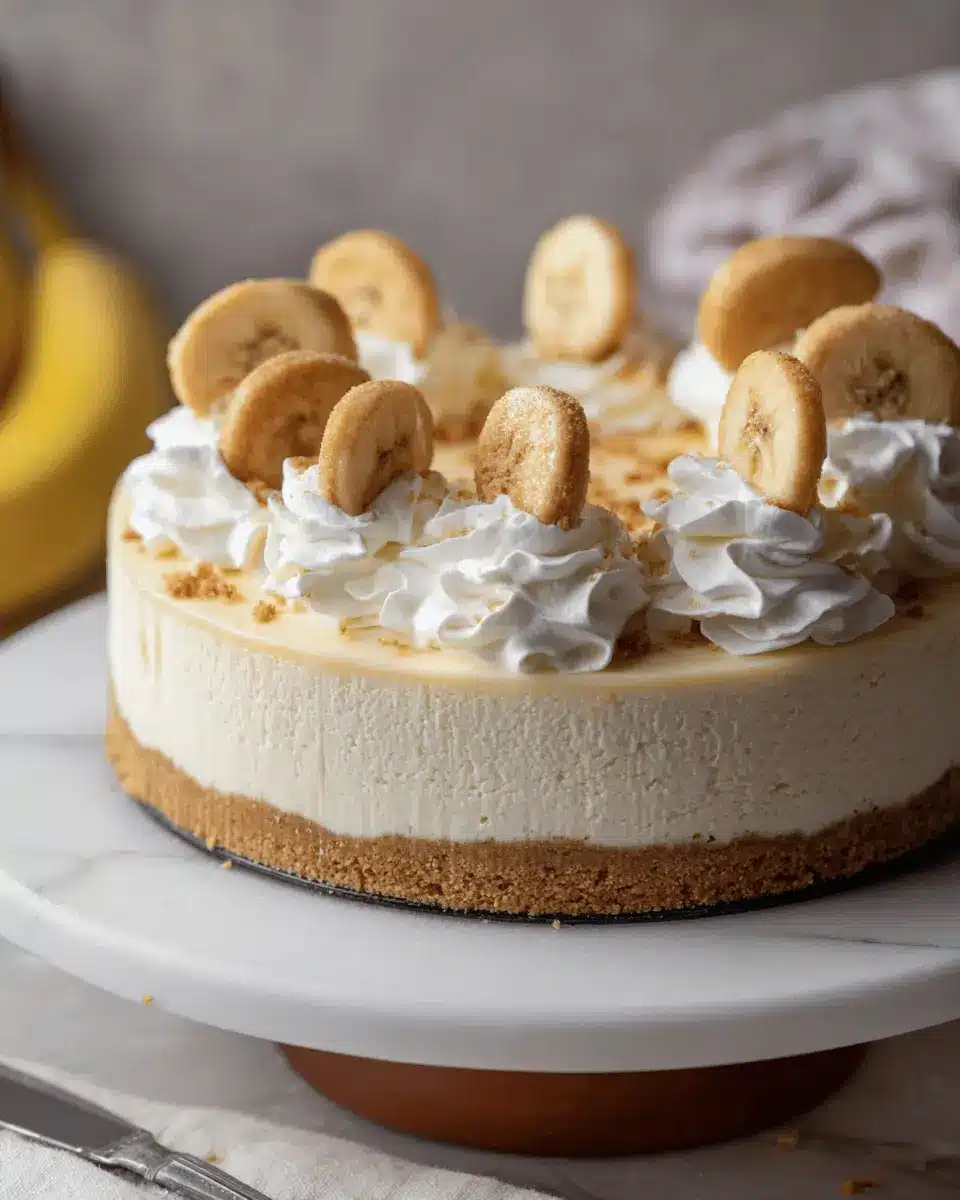
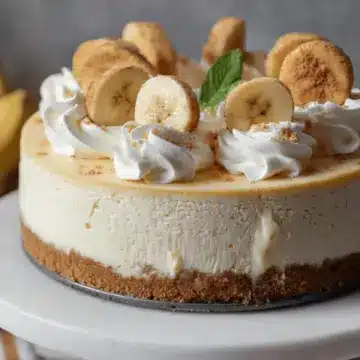
With a Nilla Wafer crust that crumbles perfectly beneath a rich and velvety filling, this dessert stands out for its unique blend of textures and tastes. The sweetness of ripe bananas melds wonderfully with the tangy cream cheese, making each bite a celebration of flavor. You may find yourself pondering: why choose just one dessert when you can have the best of both worlds?
Prepared with simple ingredients, this recipe invites you to explore the world of cheesecakes without the intimidation it often brings. Whether it's for a cozy gathering or a special occasion, this dessert is sure to impress. Ready to leave your guests in awe? Let's dive into the recipe and create your new favorite dessert!
For more popular dessert ideas, you might want to check out Food Network or Bon Appétit.
Ingredients for Banana Pudding Cheesecake
When it comes to making the perfect banana pudding cheesecake, having the right ingredients is crucial. Here’s what you'll need:
Nilla Wafer Crust Ingredients
- 3 cups crushed Nilla wafers (about 180 grams, or 1 ⅔ cups crushed)
- ¼ cup granulated sugar (50 grams)
- 5 tablespoons unsalted butter, melted and slightly cooled (70 grams)
The Nilla wafer crust is the magical foundation of this dessert. It's sweet, buttery, and just a little crunchy—everything you want in a crust!
Banana Pudding Cheesecake Filling Ingredients
- 32 ounces brick-style cream cheese, softened (4 blocks; 905 grams)
- 1 cup mashed ripe banana (about 2 large bananas; 250 grams)
- ½ cup full-fat sour cream, at room temperature (115 grams)
- 1 cup granulated sugar (200 grams)
- 1 (3.4 oz) box dry instant banana cream pudding mix (not cook & serve)
- 1 teaspoon pure vanilla extract
- 4 large eggs, at room temperature
This creamy filling is where the magic happens! The combination of ripe bananas and cream cheese creates a rich, irresistible flavor.
Optional Toppings
- 2 cups whipped cream or whipped topping (homemade or store-bought)
- 1 to 2 bananas, sliced
- 10 to 20 Nilla wafers
For a finishing touch, add some whipped cream, fresh banana slices, or extra Nilla wafers. Each bite will be a blend of creamy and crunchy, making this dessert truly unforgettable!
Looking for tips on achieving the perfect consistency? Check out this article on the science behind cheesecake silken texture here for more insights. Enjoy creating your banana pudding cheesecake!
Step-by-Step Preparation of Banana Pudding Cheesecake
Creating a banana pudding cheesecake is an exciting endeavor that combines the creamy richness of cheesecake with the delightful flavor of banana pudding. Follow these clear steps to make a dessert that will impress your friends and family.
Preheat the Oven and Prepare the Crust
Start by preheating your oven to 325°F (163°C). Take a 9-inch springform pan and line the bottom with parchment paper. This simple prep ensures that your cheesecake will come out beautifully without sticking.
Crush the Nilla Wafers
Grab your Nilla Wafers—the secret to that tasty crust! If you have a food processor, toss them in there for quick and even crushing. Don’t have one? No worries! Place the wafers in a ziplock bag and crush them with a rolling pin until you have fine crumbs. This step is crucial as it builds the foundation of flavor for your banana pudding cheesecake.
Mix the Crust Ingredients
In a medium mixing bowl, combine the crushed Nilla Wafers with ¼ cup of granulated sugar. Stir well to make sure the sugar and crumbs are evenly mixed. Next, pour in 5 tablespoons of melted unsalted butter (let it cool a bit first), and mix until the crumbs are moistened. The mixture should hold together when pressed.
Bake the Crust
Scoop the crust mixture into your prepared springform pan, pressing it firmly into a flat layer. Bake it in the oven for about 10 minutes, then remove it and set it aside to cool while you work on the filling. Don’t forget to keep the oven running at 325°F!
Prepare the Cheesecake Filling
Now onto the heart of the cheesecake. In a stand mixer or a large bowl with a handheld mixer, beat 32 ounces of softened cream cheese until smooth. Add 1 cup of mashed ripe banana (about 2 large bananas) and ½ cup of sour cream, mixing until fully combined. Following this, add 1 cup of granulated sugar, a box of dry instant banana pudding mix, and 1 teaspoon of vanilla extract. Mix until thoroughly blended.
Bake the Cheesecake in a Water Bath
Water baths help create a gentle environment for baking cheesecakes, preventing cracks. Wrap the bottom of the springform pan in aluminum foil to keep water from seeping in, and place it in a larger roasting pan filled with boiling water, about 1-inch deep. Pour the cheesecake filling into the springform pan, smoothing the top before transferring to the oven. Bake for 70 to 80 minutes. It's perfect when the edges are set but the center still jiggles slightly.
Cool and Chill the Cheesecake
After baking, turn off the oven and crack the door, allowing it to cool gradually for about an hour. Then, let the cheesecake cool on a wire rack completely before covering it tightly and chilling in the fridge for at least 5 to 6 hours—or overnight for the best results.
This whole process may seem lengthy, but each step contributes to a deliciously rich banana pudding cheesecake. It’s definitely worth the wait! Once chilled, consider topping your cheesecake with whipped cream, sliced bananas, and Nilla Wafers for that extra touch of indulgence.
For more tips on making desserts like this, check out Baker's Journal or Bon Appétit. Happy baking!
Variations on Banana Pudding Cheesecake
Nutty Banana Pudding Cheesecake
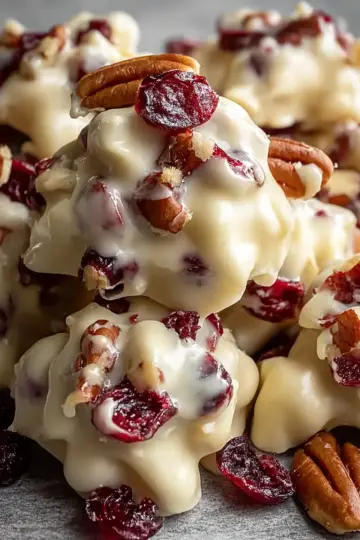
For a delightful twist, consider adding a nutty flavor to your banana pudding cheesecake. Simply stir in ½ cup of chopped pecans or walnuts into your cheesecake filling before baking. This variation not only adds a pleasing crunch but also complements the creamy texture beautifully. If you love nutty flavors, you can also use almond or hazelnut crust for an extra layer of flavor!
Chocolate Swirled Banana Pudding Cheesecake
Craving chocolate? This variation mixes rich flavors with a simple tweak. Melt 4 ounces of chocolate (dark or milk) and swirl it into your banana pudding cheesecake filling prior to baking. Not only will this create a stunning visual, but it will also add a decadently sweet chocolate note that pairs perfectly with the bananas. Feeling adventurous? Drizzle some chocolate sauce on top for an irresistible finish!
These variations allow you to personalize your banana pudding cheesecake, making it an exciting dessert for any occasion. For more recipe ideas, check out this baking blog.
Cooking Tips and Notes for Banana Pudding Cheesecake
Importance of Room Temperature Ingredients
For a perfectly creamy banana pudding cheesecake, using room temperature ingredients is crucial. This allows everything to blend smoothly, preventing lumps in your filling. Remember, room temperature cream cheese should be soft to the touch, which helps achieve that luscious texture we all love.
How to Avoid Cracks in Your Cheesecake
To keep your cheesecake looking picture-perfect, aim for a gentle baking process. Avoid sudden temperature changes by cracking the oven door during the cooling phase. A water bath is also key; it helps maintain even heat. For a reliable guide on preventing cheesecake cracks, check out resources like The Kitchn. Following these tips will ensure a beautifully smooth top on your creamy deliciousness!
Serving Suggestions for Banana Pudding Cheesecake
Garnishing Options
Elevate your banana pudding cheesecake with delightful garnishes! Top it with a generous dollop of whipped cream, some sliced fresh bananas, and a sprinkle of crushed Nilla wafers for that extra crunch. You might also consider drizzling a bit of caramel sauce or chocolate syrup on top for a rich flavor contrast. Feeling adventurous? Add a handful of mini marshmallows for a fun twist!
Pairing with Beverages
To complement your banana pudding cheesecake, consider serving it with a refreshing iced tea or a creamy vanilla latte. For something a bit more indulgent, a frothy milkshake—banana or vanilla flavored—would mirror the cheesecake perfectly. Don’t forget a glass of cold milk, which is a timeless favorite for any sweet treat!
Time Breakdown for Banana Pudding Cheesecake
When it comes to creating the perfect banana pudding cheesecake, it's all about planning your time effectively. Here’s a simple breakdown:
Preparation Time
Get your game face on with a prep time of 40 minutes. This includes gathering ingredients and making your crust.
Cooking Time
Baking takes about 1 hour and 20 minutes. During this time, your cheesecake will transform into something divine!
Cooling Time
You'll want to set aside 6 hours for cooling. Patience is key here; chilling helps to enhance those rich flavors.
Total Time
The grand total adds up to 8 hours. Remember, this includes cooling time, so feel free to whip up the cheesecake on a weekend morning and enjoy it later as a sweet treat!
Armed with this time breakdown, you’re ready to take on your banana pudding cheesecake adventure! For further reading on baking cheese-based desserts, you might enjoy checking out reputable sites like The Kitchn or Serious Eats. Happy baking!
Nutritional Facts for Banana Pudding Cheesecake
When indulging in a slice of banana pudding cheesecake, it's helpful to know its nutritional profile to balance your treats with healthy choices. Here's a quick overview:
- Calories: Approximately 420 per slice, making it a rich dessert option.
- Total Fat: Contains around 26 grams, primarily from the creamy filling and buttery crust.
- Sugar Content: Each slice packs about 30 grams of sugar, contributing to its sweetness.
For further details, the USDA offers extensive nutritional data to help you keep track of your dietary intake. Enjoy in moderation!
FAQs about Banana Pudding Cheesecake
Can I make this cheesecake ahead of time?
Absolutely! In fact, making banana pudding cheesecake ahead of time enhances its flavors. You can prepare it a day or two in advance and let it chill in the refrigerator to set properly. Just ensure it's covered tightly to prevent any odors from your fridge affecting its taste!
What is the best way to store leftovers?
To preserve the deliciousness of your cheesecake, store leftovers in an airtight container in the refrigerator. It should stay fresh for up to four days. If you're looking for a longer storage option, consider freezing!
Can I freeze banana pudding cheesecake?
Yes, you can freeze your banana pudding cheesecake! Wrap it tightly with plastic wrap, place it in a large freezer bag, and it will keep well for up to three months. When you're ready to enjoy it, simply thaw it overnight in the refrigerator. Once thawed, top it with whipped cream and fresh bananas for that lovely finishing touch!
For more baking tips, you might enjoy exploring this guide on cheesecake storage.
Conclusion on Banana Pudding Cheesecake
In conclusion, this banana pudding cheesecake is the perfect blend of indulgence and nostalgia. With its creamy texture, rich flavors, and beloved Nilla wafer crust, it’s sure to delight friends and family alike. Whether for a special occasion or just because, this dessert is a must-try!
Banana Pudding Cheesecake
Equipment
- 9-inch springform pan
- food processor
- Stand Mixer
- large roasting pan
- aluminum foil
- Whisk
Ingredients
Nilla Wafer Crust
- 3 cups whole Nilla wafers crushed
- 0.25 cups granulated sugar
- 5 tablespoons unsalted butter melted and slightly cooled
Banana Pudding Cheesecake Filling
- 32 ounces brick-style cream cheese softened to room temperature
- 1 cups mashed ripe banana about 2 large ripe fresh bananas
- 0.5 cups full-fat sour cream room temperature
- 1 cups granulated sugar
- 1 box dry instant banana cream pudding mix (NOT cook & serve)
- 1 teaspoon pure vanilla extract
- 4 large eggs at room temperature
Optional Toppings
- 2 cups whipped cream or whipped topping (homemade or store-bought)
- 1 to 2 bananas sliced
- 10 to 20 pieces Nilla wafers
Instructions
Make the Crust
- Preheat the oven to 325°F (163°C).
- Line the bottom of a 9-inch springform pan with parchment paper. Set aside.
- Crush the Nilla wafers in a food processor until resembling fine crumbs, or crush in a ziplock bag with a rolling pin.
- Combine the crushed Nilla wafer crumbs and granulated sugar in a mixing bowl and stir until well combined. Add melted butter and mix until moistened.
- Scoop the mixture into the prepared springform pan and press it down into an even layer.
- Bake for 10 minutes, then set aside to cool while making the filling.
Make the Cheesecake Filling
- In a large pot, bring water to a boil for the water bath.
- Beat the cream cheese in a stand mixer on low-medium speed until smooth (1-2 minutes).
- Add the mashed banana and sour cream and mix until combined. Add the granulated sugar, banana cream pudding mix, and vanilla extract, mixing well (30-60 seconds).
- Lightly beat the eggs in a separate bowl and add to the mixture, mixing on low speed until just combined. Use a rubber spatula to ensure everything is mixed.
- Secure the bottom of the springform pan with aluminum foil to prevent water from entering and place it in an oven bag.
- Pour the cheesecake filling into the pan and smooth it out.
- Add boiling water to a roasting pan until about 1-inch deep, then carefully place the springform pan in the roasting pan.
- Bake for 70 to 80 minutes until edges are set and the center is slightly jiggly. Turn off oven, crack the door, and let cool for 1 hour.
- After 1 hour, cool the cheesecake on a wire rack. Once cooled, cover and refrigerate to chill for 5 to 6 hours or overnight.
Assemble the Cheesecake
- Run a thin knife around the outside of the cheesecake to loosen it, carefully release the springform pan.
- Decorate with whipped cream, sliced bananas, and Nilla wafers.
Leave a Reply