
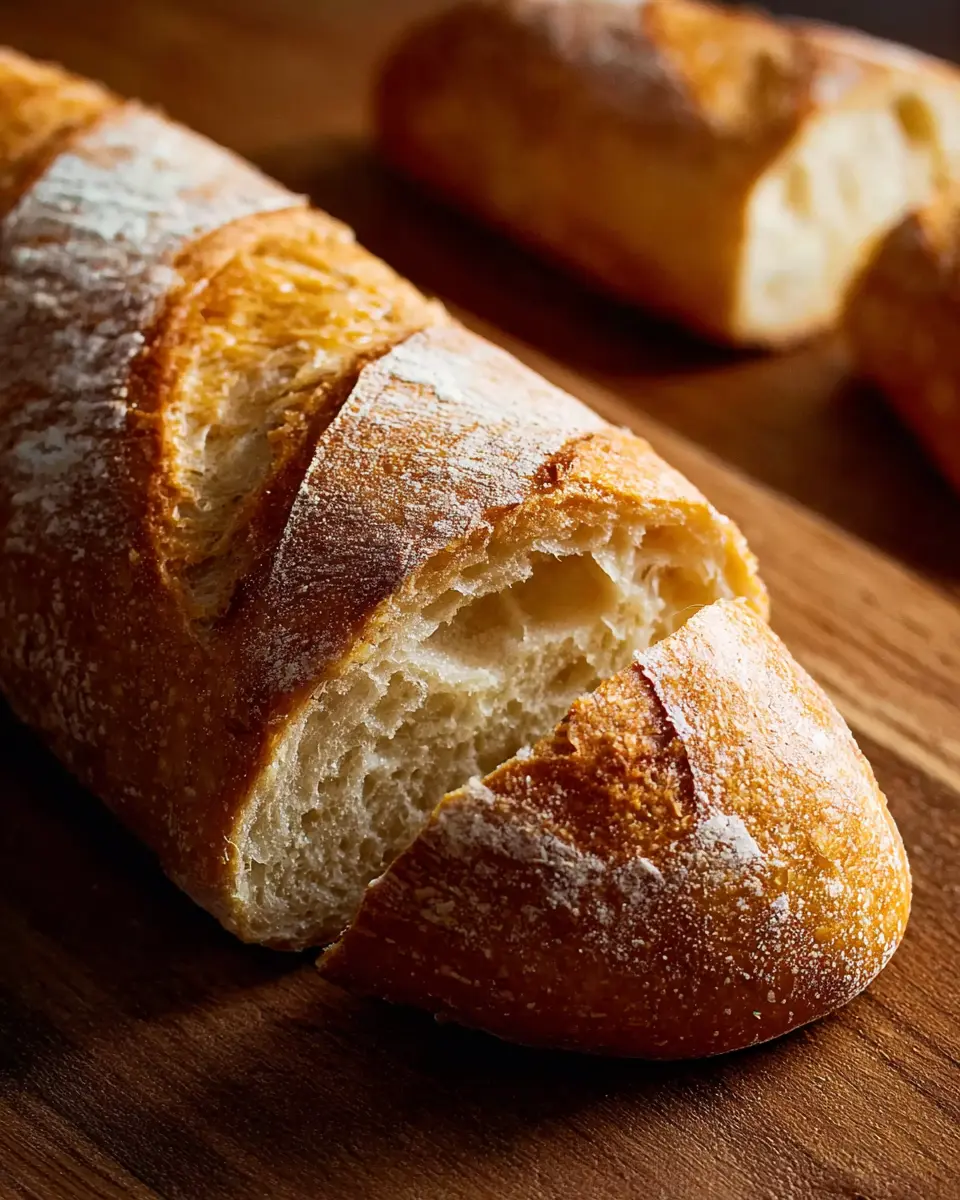
Introduction to Homemade French Bread
If you're a young professional navigating the hectic pace of daily life, you might just find that homemade French bread is the perfect companion to elevate your meals. Not only is it a delightful addition to any dinner table, but it's also impressively simple to make. Picture this: a loaf fresh out of the oven, crusty on the outside yet chewy on the inside. A slice of this bread can transform a simple sandwich or soup into a gourmet experience.
Moreover, making French bread at home allows you to customize flavors and ingredients to your liking. Whether you're going for a classic recipe or experimenting with herbs and spices, the options are endless. And did you know that baking your bread can actually be a therapeutic activity? Many find the rhythmic kneading and the warm aroma of bread baking to be a comforting escape from their busy schedules.
For many young professionals, embracing homemade food is also a fantastic way to save money while satisfying your taste buds. So, why not invest a little time in making your own French bread? It’s more rewarding than you might think! You can explore more about the benefits of making food from scratch here.
Ingredients for French Bread
When it comes to crafting authentic French bread, having the right ingredients is essential. Here’s what you’ll need to get started on your baking journey.
Essential ingredients you’ll need
- Cornmeal: 1 tablespoon, for dusting your baking sheet and adding a light crunch.
- All-purpose flour: 6 cups provide the structure and texture that make French bread so delightful.
- Active dry yeast: 2 ½ packages (or 2 ¼ teaspoons) to give your dough that necessary rise.
- Salt: 1 ½ teaspoons for flavor enhancement.
- Warm water: 2 cups at about 110°F (45°C) to activate the yeast.
- Egg white: For a shiny crust that’s as beautiful as it is tasty.
- Water: 1 tablespoon to help seal your dough rolls.
Alternative ingredient suggestions
If you're missing something on this list, don’t fret! Here are some alternatives you can consider:
- Whole wheat flour: Swap out part of the all-purpose flour for a whole grain option, which can add texture and a nutty flavor.
- Honey or sugar: Instead of traditional sugar, a tablespoon of honey can enhance the yeast's performance and flavor profile.
- Milk: For a richer taste, consider using warm milk instead of water, which can also add a nice softness to the bread.
Using these ingredients, you'll be on your way to enjoying homemade French bread that rivals any bakery's. For more tips on perfecting your bread-making skills, check out resources from King Arthur Baking or The Kitchn!
Preparing French Bread
Making French bread at home can feel daunting, but with the right approach, it’s a fun and rewarding process! Let’s walk through each step together, ensuring you create delicious, crusty loaves that will impress your friends and family.
Gather and Prep Your Ingredients
To start, it's important to have everything at your fingertips. Gather the following:
- 1 tablespoon cornmeal
- 6 cups all-purpose flour
- 2 ½ (.25 ounce) packages active dry yeast
- 1 ½ teaspoons salt
- 2 cups warm water (110 degrees F or 45 degrees C)
- 1 egg white
- 1 tablespoon water
Give yourself about 25 minutes for prep time. You can also lightly grease a large baking sheet and sprinkle it with cornmeal, which not only prevents sticking but adds texture to your bread crust.
Combine Flour, Yeast, and Salt
In a bowl (or your stand mixer), mix 2 cups of flour with yeast and salt. The combination of ingredients is crucial; yeast is what gives your French bread that delightful rise and airy texture. Once blended, stir in the warm water and beat with the dough hook until well combined. Slowly add in the remaining flour until the mixture is fully incorporated.
Knead the Dough to Perfection
Kneading is vital to developing that iconic chewy texture. Transfer your dough to a lightly floured surface and knead for about 8 to 10 minutes, until it feels smooth and elastic. You're not just exercising your arms—you’re also creating gluten, which helps your bread rise beautifully.
Let the Dough Rise
Once your dough is perfectly kneaded, shape it into a ball and place it in a greased bowl. Cover it with a cloth and let it rise in a warm place until it nearly doubles in size—this should take around 1 hour. Pro tip: find a cozy spot, like your oven (turned off!), where the dough can flourish.
Shape Your Loaves
After the dough has risen, punch it down to release excess air, then divide it in half. Give each half a quick rest before rolling it into a rectangle. Tightly roll from a long side, sealing the edges with a bit of water. Taper the ends for that classic French bread look!
Prep for Baking with Egg Wash and Cuts
Before baking, place the loaves seam-side down on your prepared baking sheet. Mix the egg white with a tablespoon of water and brush it over the loaves for a shiny finish. Use a sharp knife to make a few diagonal cuts on top—this allows steam to escape while baking.
Bake Your French Bread
Preheat your oven to 375 degrees F (190 degrees C) and bake those beauties for about 20 minutes. Halfway through, brush them again with the egg wash to add shine. Keep baking until they sound hollow when tapped. When done, cool the loaves on a wire rack before slicing.
With these steps, you'll not only master the art of making French bread, but you'll also enjoy the irresistible aroma filling your kitchen—perfect for an evening get-together or Friday night dinner. Happy baking!
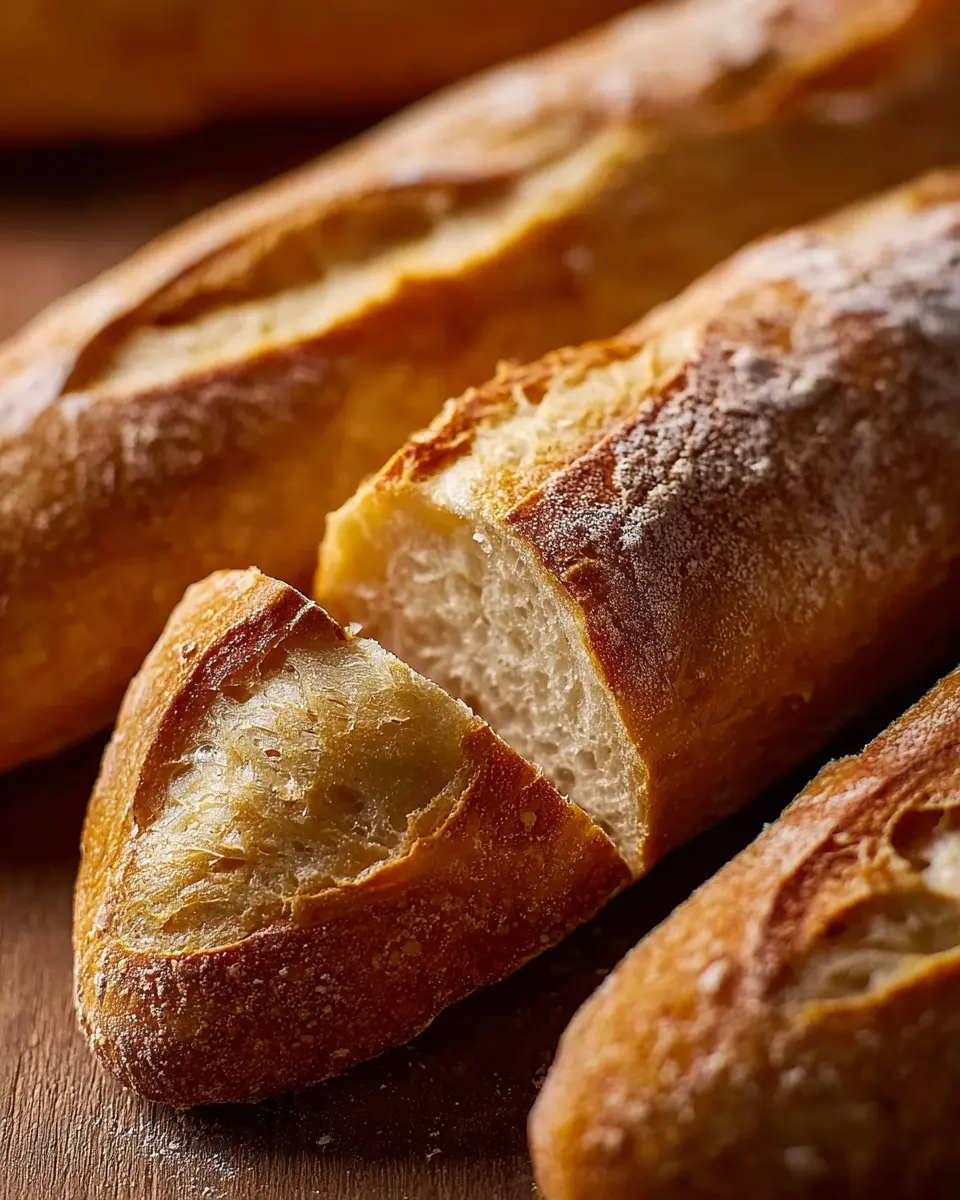
Variations on French Bread
Garlic and herb French bread
For a savory twist, consider making garlic and herb French bread. Simply mix minced garlic and your favorite dried herbs, like rosemary or thyme, into the dough while kneading. This infusion adds a delightful aroma and flavor that’s perfect for dipping in olive oil or pairing with soups. You could also top the loaves with grated Parmesan before baking for an extra cheesy touch!
Whole wheat French bread options
If you're looking for a healthier version, whole wheat French bread is fantastic. Substitute half of the all-purpose flour with whole wheat flour for a nuttier flavor and added fiber. This variation not only offers a hearty texture but also enhances the nutritional profile of your bread. For creative ideas, you can explore recipes at King Arthur Baking or Food52.
These variations will elevate your French bread game and impress your friends at any gathering!
Baking notes for French Bread
Common baking pitfalls to avoid
When making French bread, a few common pitfalls can leave your loaves less than perfect. First, ensure your yeast is fresh; expired yeast won't rise properly. Also, maintain the right water temperature—too hot can kill the yeast, while too cold may not activate it. Lastly, resist the urge to rush the rising process: proper proofing is essential for that delightful texture.
Storage tips for freshness
To keep your French bread fresh longer, store it at room temperature in a paper bag or bread box. Avoid plastic, which can trap moisture and lead to sogginess. If you won't eat it within a couple of days, consider wrapping and freezing it for later. Just remember to slice it before freezing for easy access!
For even more tips on bread storage, check out King Arthur Baking.
Serving suggestions for French Bread
Pairing Ideas with Soups and Salads
French bread shines as a sidekick to many dishes. Imagine dipping a thick slice into a creamy butternut squash soup or enjoying it alongside a crisp Caesar salad. The crusty exterior and chewy interior of French bread soak up flavors beautifully, enhancing your meal's overall taste. Try it with a vegetable minestrone for a hearty lunch, or pair it with a simple mixed greens salad dressed in lemon vinaigrette to balance richness. For a touch of class, elevate your soup or salad experience by adding fresh herbs like basil or parsley.
Creative Sandwich Options
Looking for sandwich inspiration? French bread is a fantastic base for various creations! Spread a layer of hummus and pile on roasted vegetables for a fulfilling vegetarian delight. For a protein-packed option, consider using sliced turkey bacon and chicken ham, topped with avocado and spinach for a delightful brunch treat. You can also whip up a classic French dip sandwich by layering thinly sliced roast beef and melted cheese, served with a savory dipping sauce. The possibilities are endless, making French bread an ideal canvas for your next culinary adventure.
For more inspiration, check out this great article on sandwich ideas to keep your meals exciting!
Tips for Perfect French Bread
Ensuring the Right Dough Consistency
To achieve that ideal texture in your French bread, your dough should be soft but not overly sticky. When kneading, keep a light dusting of flour on hand. If your dough sticks to the surface or your hands, add flour gradually—just enough to make it manageable. The dough should spring back when poked but still hold its shape. For a visual guide, check out this helpful video tutorial on kneading techniques!
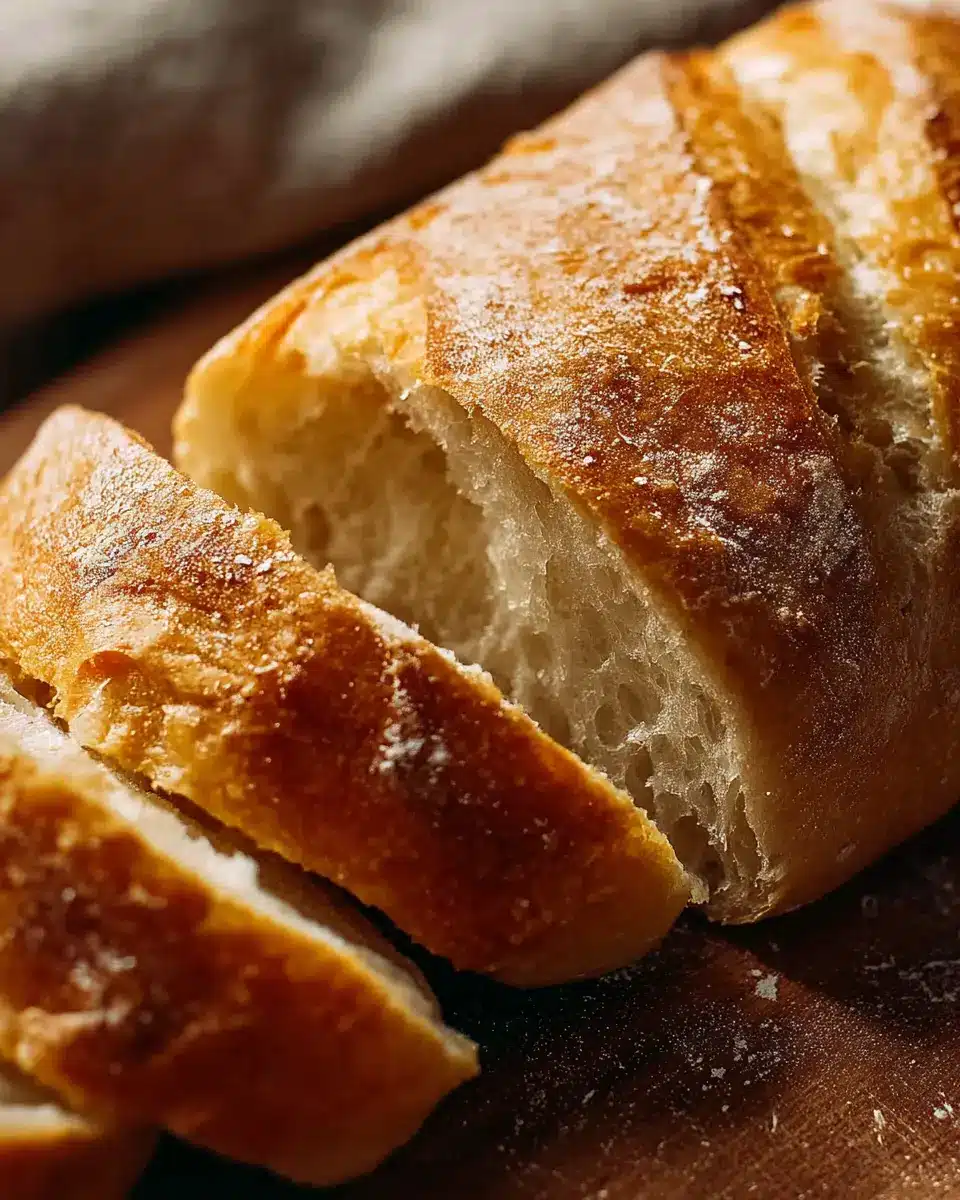
Mastering the Crustiness Factor
For a beautifully crispy crust, steam is your best friend. Place a pan filled with water on the oven's bottom rack while your bread bakes. This will create steam, giving your loaves that classic crust you crave. You can also try spraying water into the oven during the first few minutes of baking for additional crunch. Remember, the right temperature matters too; aim for a hot oven at 375°F for perfect results!
Time Details for French Bread
Preparation Time
Get ready to embark on your French bread journey! The prep will take you about 25 minutes. This includes gathering your ingredients and mixing the dough to create a beautiful bread base.
Baking Time
Once your dough has risen and shaped into loaves, the baking process takes around 35 minutes. This includes two stages: the initial baking and the final touch-ups to get that golden hue and crispy crust.
Total Time
From start to finish, you’re looking at a total time of 2 hours and 45 minutes. Don't be daunted by this; most of it is hands-off time where you can relax or prepare the rest of your meal.
For a deeper dive into making this classic French bread, check out sources like King Arthur Baking for some pro tips!
Nutritional information for French Bread
Calories per serving
This delightful French bread packs in approximately 94 calories per serving. Each slice is a wholesome way to indulge without overwhelming your daily caloric intake, making it a perfect addition to your meals or snacks.
Key nutrients included
In addition to being low in calories, this French bread is a source of essential nutrients, including:
- Total Fat: 0g
- Sodium: 119mg
- Total Carbohydrates: 20g
- Dietary Fiber: 1g
- Protein: 3g
Each serving also provides small amounts of Calcium (5mg), Iron (1mg), and Potassium (41mg), contributing to a balanced diet. For more insights on the nutritional value of bread, check out resources from the USDA or The Academy of Nutrition and Dietetics. This makes your homemade French bread not just a delicious treat, but a nutrient-rich option too!
FAQs about French Bread
How do I achieve the perfect crust?
To create that signature crispy crust on your French bread, steam is key! When baking, place a shallow pan filled with hot water at the bottom of your oven. This moisture helps generate steam, which promotes a golden, crusty exterior. Additionally, scoring the dough before baking allows for controlled expansion, enhancing both texture and appearance.
Can I freeze baked French bread?
Absolutely! Freezing French bread is a great way to enjoy it later. Once it's completely cooled, wrap it tightly in plastic wrap and then in aluminum foil to prevent freezer burn. When you’re ready to indulge, let it thaw at room temperature or pop it in the oven for a few minutes to restore its delightful crunch.
What’s the best way to store leftover French bread?
To keep your French bread fresh, store it in a paper bag at room temperature for up to two days. If you plan to keep it longer, wrapping it in plastic and refrigerating it will extend its shelf life, but it can lose some quality. For the best texture, consider toast or use it in recipes like bread pudding!
Conclusion on Homemade French Bread
Homemade French bread is a rewarding culinary adventure that brings warmth and satisfaction to any meal. Don't wait—start baking today! The aroma of fresh bread is irresistible, and with just a little practice, you’ll master this classic recipe. Enjoy the process and savor every slice!
Encouragement to Start Baking Today
Baking French bread at home is an enjoyable experience that offers countless benefits, from filling your kitchen with delightful aromas to providing fresh loaves for your family and friends. The satisfaction of crafting something delicious from scratch is unparalleled. So, roll up your sleeves and enjoy this fulfilling culinary journey!
For tips on perfecting your bread skills, consider checking out resources like King Arthur Baking or Bread Baking, where you can find a wealth of information to enhance your baking efforts. Happy baking!

French Bread
Equipment
- Stand Mixer
- baking sheet
- wire rack
Ingredients
- 1 tablespoon cornmeal
- 6 cups all-purpose flour
- 2 ½ packages active dry yeast (0.25 ounce each)
- 1 ½ teaspoons salt
- 2 cups warm water (110 degrees F/45 degrees C)
- 1 large egg white
- 1 tablespoon water for egg wash
Instructions
- Gather all ingredients.
- Grease a large baking sheet and sprinkle with cornmeal. Set aside.
- Combine 2 cups flour, yeast, and salt in the bowl of a stand mixer. Stir in 2 cups warm water; beat with the dough hook attachment until blended. Continue adding remaining flour, a little at a time, until incorporated.
- Knead dough on a lightly floured surface until smooth and elastic, 8 to 10 minutes. Shape into a ball, place in a greased bowl, and turn once.
- Cover and let rise in a warm place until doubled in size, about 1 hour.
- Punch dough down and divide in half.
- Turn out onto a lightly floured surface. Cover and let rest for 10 minutes.
- Roll each half into a large rectangle. Roll up, starting from a long side. Moisten edge with water and seal. Taper ends.
- Place loaves, seam-side down, on the prepared baking sheet.
- Lightly beat egg white with 1 tablespoon water and brush over loaves.
- Cover with a damp cloth and let rise until nearly doubled, 35 to 40 minutes. Preheat the oven to 375 degrees F (190 degrees C).
- Use a sharp knife to make 3 or 4 diagonal cuts, about ¼-inch deep, across top of each loaf.
- Bake in the preheated oven for 20 minutes.
- Brush loaves with egg white mixture.
- Continue baking until an instant-read thermometer inserted into the center reads 190 degrees F (88 degrees C) or loaves sound hollow when tapped, 15 to 20 minutes more. If necessary, cover loosely with foil to prevent over-browning.
- Remove loaves from the baking sheet and cool on a wire rack.


Leave a Reply