
Introduction to Red Velvet Brownies
Why Red Velvet Brownies are a Game Changer for Young Professionals
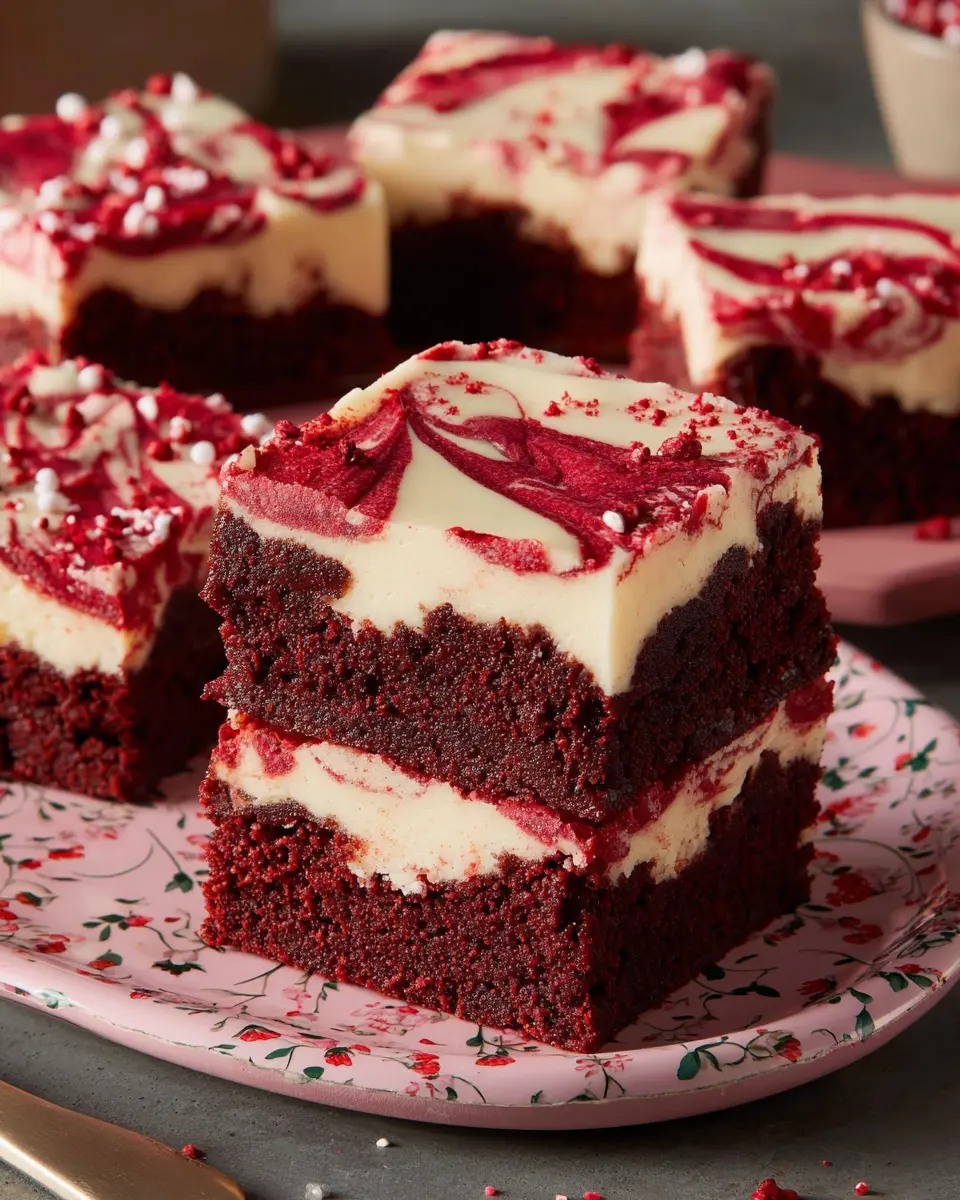
If you’re a young professional balancing a bustling career and a rich social life, Red Velvet Brownies might just become your new favorite treat. These brownies blend the classic decadence of rich chocolate with the stunning color and flair of red velvet, creating a showstopper dessert that’s perfect for any occasion—from a cozy night in to a lively office potluck.
Imagine this: after a long day at work, you want something sweet that also brings a touch of joy. That's where these brownies shine. The velvety texture paired with a luscious cream cheese swirl elevates your standard brownie experience into a delightful indulgence, making them a standout choice for impressing friends or simply treating yourself.
Not only are they delicious, but they also invite creativity in the kitchen. As you learn to master this recipe, you’ll enjoy experimenting with flavors and presentations that showcase your budding culinary skills. If you want to explore more baking tips, check out resources like King Arthur Baking for guidance.
These Red Velvet Brownies offer not just a sweet treat but a potential conversation starter—and who wouldn’t want that?
Ingredients for Red Velvet Brownies
Creating the perfect batch of Red Velvet Brownies begins with gathering a few essential ingredients. Don’t worry; many of these items are likely staples in your kitchen already. Here’s what you’ll need to whip up these delightful brownies:
- Nonstick cooking spray: To prevent sticking and ensure easy removal from the pan.
- 8 oz. bittersweet chocolate bars, chopped: The rich chocolate base gives these brownies their deep flavor.
- 1 ½ cups granulated sugar: Sweetness that balances out the cocoa.
- 1 cup packed light brown sugar: Adds moisture and a hint of caramel flavor.
- 1 cup unsalted butter, cubed: Essential for a rich, fudgy texture.
- ¼ cup unsweetened cocoa powder: Deepens the chocolate flavor.
- 6 large eggs, room temperature: Provides structure and richness to the brownies.
- 1 (1-oz.) bottle red food coloring: The star ingredient for that signature crimson hue.
- Vanilla extract: Adds warmth and depth; you'll need 1 Tbsp. plus 2 tsp.
- All-purpose flour: A total of 1 ¾ cups plus 2 tbsp. for the right texture.
- Kosher salt: To enhance flavors.
- White chocolate chips: A delicious contrast to the rich red velvet.
- 12 oz. cream cheese, softened: For a delightful cheesecake swirl.
- ⅓ cup sour cream, room temperature: Increases moisture and tanginess.
Gather these ingredients, and you’re on your way to indulging in some delicious, homemade Red Velvet Brownies. If you’re curious about the science behind baking, check out King Arthur Baking for insightful articles!
Step-by-Step Preparation of Red Velvet Brownies
Gather Your Ingredients and Tools
Before getting lost in the colorful world of Red Velvet Brownies, it’s essential to gather all your ingredients and tools. This helps streamline the process and sets you up for success. Here’s what you’ll need:
- Nonstick cooking spray
- 8 oz. bittersweet chocolate bars, chopped
- 1.5 cups granulated sugar (divided)
- 1 cup packed light brown sugar
- 1 cup unsalted butter, cubed
- ¼ cup unsweetened cocoa powder
- 6 large eggs (room temperature, divided)
- 1 bottle (1 oz.) red food coloring
- 1 Tbsp. plus 2 tsp. vanilla extract (divided)
- 1.75 cups plus 2 tbsp. all-purpose flour (divided)
- ½ tsp. kosher salt
- 1 cup white chocolate chips
- 12 oz. cream cheese (softened)
- ⅓ cup sour cream (room temperature)
Make sure you have an electric mixer or stand mixer handy, and it wouldn’t hurt to have a spatula and measuring cups for precision!
Preheat and Prepare Your Baking Pan
Next, preheat your oven to 325°F, and grab a 13-by-9-inch baking pan. Spray it with nonstick cooking spray and line it with parchment paper, allowing 2 inches overhang on the long sides. This makes for easy removal of your delicious Red Velvet Brownies later on. Spray the parchment paper too, and you’re good to go!
Melt and Mix the Chocolate Base
In a large saucepan over medium-low heat, melt the chopped bittersweet chocolate, 1 cup of granulated sugar, brown sugar, and cubed butter. Stir until the chocolate is smooth, which usually takes about 3 minutes. After that, remove it from heat and whisk in the cocoa powder until it’s all combined. Let it cool for about 15 minutes while you enjoy the rich chocolate aroma filling your kitchen.
Incorporate Eggs and Food Coloring
Once slightly cooled, whisk in 5 of the eggs, one at a time, to create a silky mixture. Stir in the red food coloring and 1 Tbsp. of vanilla extract. You’ll see the beautiful crimson hue take shape!
Combine Batter with Flour and Salt
Next, fold in 1.75 cups of all-purpose flour and the kosher salt gently. Avoid over-mixing, just enough to ensure everything is well combined. In a separate bowl, set aside ½ cup of this brownie batter for later use.
Prepare the Cream Cheese Layer
In a stand mixer or a large bowl, beat the softened cream cheese with the remaining ½ cup of granulated sugar and 2 tsp. of vanilla at medium speed. Mix until it’s creamy, about 1-2 minutes. Incorporate the sour cream and the remaining egg, mixing until just combined. Lastly, blend in the remaining 2 tablespoons of flour until you see a smooth mixture.
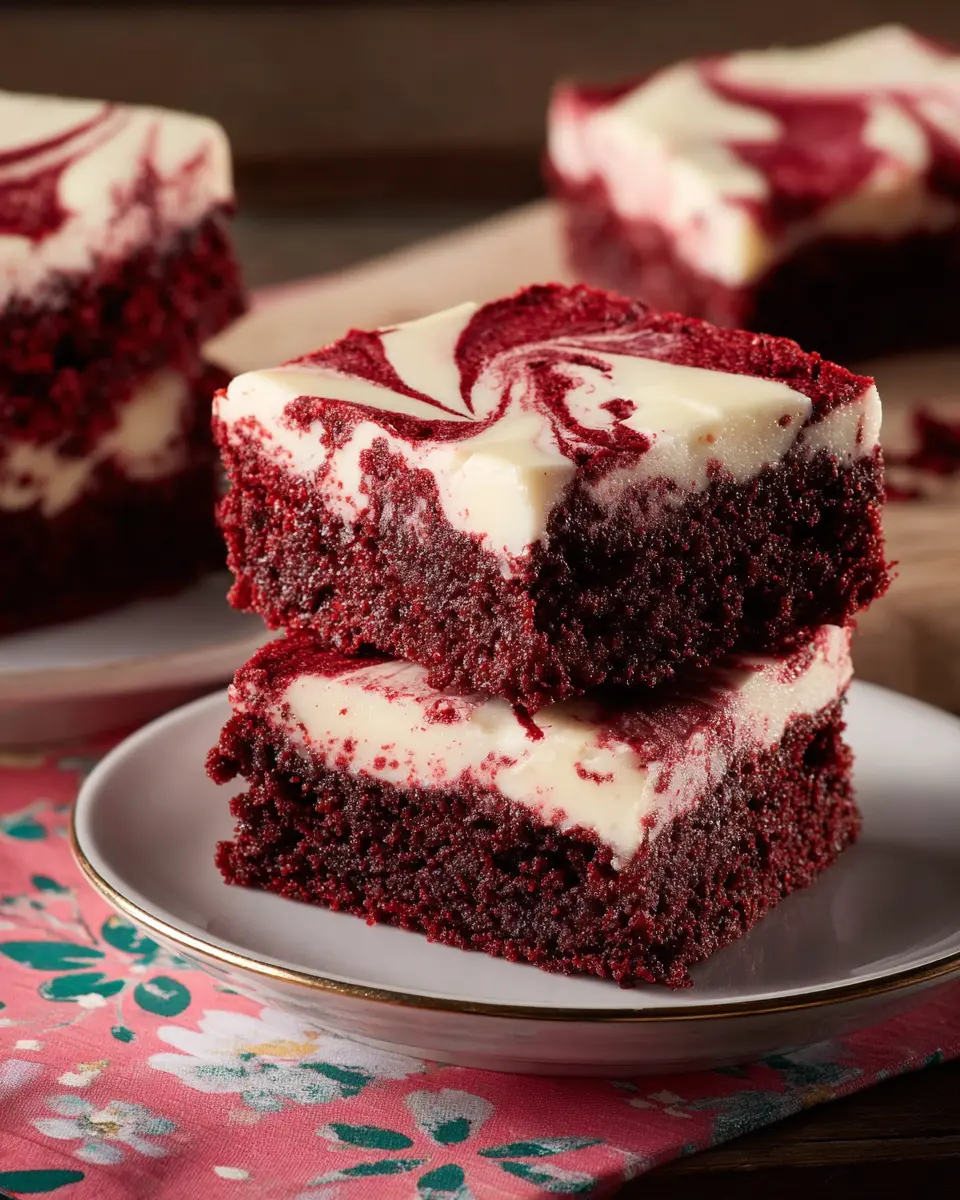
Layer and Swirl the Brownie and Cheesecake Mixtures
Now comes the fun part! Spoon the brownie batter into the prepared pan, smoothing it into an even layer. Carefully dollop the cream cheese mixture over the brownie layer and spread it smoothly. Then, take the reserved brownie batter and dot it over the cheesecake layer. Use a toothpick or knife to create swirls; this adds a beautiful marbled effect.
Bake to Perfection
Finally, pop your pan into the oven and bake for 50 to 55 minutes. To check if they’re done, simply insert a wooden pick in the center; a few crumbs are fine! Once baked, allow the brownies to cool on a wire rack for an hour, then refrigerate for another hour. Trust me, this step is crucial for achieving that perfect chewy texture.
And there you have it! A step-by-step guide to creating decadent Red Velvet Brownies that are sure to impress. Happy baking! If you're keen on a classic twist, consider adding some crushed nuts or a drizzle of chocolate on top!

Variations on Red Velvet Brownies
Chocolate Mint Red Velvet Brownies
Looking to add a refreshing twist to your Red Velvet Brownies? Consider incorporating chocolate mint! Just mix in a teaspoon of peppermint extract and top with mint chocolate chips. The result? A delightful combination of rich chocolate and cool mint that’s perfect for the holidays or special occasions. Your taste buds will thank you!
Nutty Red Velvet Brownies with Walnuts
If you’re a fan of nutty flavors, you can't go wrong with walnuts in your Red Velvet Brownies. Simply fold in chopped walnuts for a satisfying crunch. Not only do they elevate the texture, but they also add a lovely earthy contrast to the sweet brownie base. This variation is perfect for those cozy evenings when you just want to indulge!
For more tips on variations, check out this guide on baking with nuts!
Cooking Tips and Notes for Red Velvet Brownies
When making Red Velvet Brownies, precision is key! Here are some helpful tips:
-
Ingredient Temperature: Ensure that your eggs and sour cream are at room temperature. This helps create a smoother batter and better incorporation.
-
Swirling Technique: When swirling the brownie and cheesecake layers, use a gentle hand. Too much mixing can muddy the beautiful red and white layers.
-
Storage: These brownies stay fresh in an airtight container in the fridge for up to a week. For longer storage, you can freeze them.
Curious about other baking techniques? Check out this baking tips resource for additional insights! Happy baking!
Serving Suggestions for Red Velvet Brownies
Red Velvet Brownies are a delightful treat that pairs wonderfully with various accompaniments. To enhance your indulgence, consider these serving suggestions:
- Classic Cream Cheese Frosting: Add a generous layer of cream cheese frosting for an extra touch of sweetness.
- Fresh Berries: Serve alongside strawberries or raspberries to balance the rich flavors with tartness.
- Ice Cream Delight: A scoop of vanilla or salted caramel ice cream makes an excellent contrast to the brownies' fudge-like texture.
- Coffee or Herbal Tea: Enjoy these brownies with a hot cup of coffee or soothing herbal tea for a cozy dessert experience.
These serving options elevate the experience and offer a delightful blend of flavors!
Time Breakdown for Red Velvet Brownies
Preparation Time
To get started on these delicious Red Velvet Brownies, set aside 30 minutes for preparation. This includes gathering your ingredients and mixing the brownie batter, so be ready to bring your baking skills to the forefront!
Baking Time
Once your brownies are in the oven, let them bake for about 50 to 55 minutes. The aroma will fill your kitchen as they transform into a luscious treat.
Total Time
In total, you're looking at approximately 4 hours and 30 minutes. This includes cooling and chilling time, ensuring that your brownies reach that perfect texture before serving. A little patience here pays off big time!
Ready to indulge in these delightful Red Velvet Brownies? You’ll find the whole experience richly rewarding! For more great baking tips and recipes, check out resources like King Arthur Baking for inspiration. Happy baking!
Nutritional Facts for Red Velvet Brownies
When indulging in your delicious Red Velvet Brownies, it's handy to know what you're enjoying. Here’s a quick overview of their nutritional content:
Calories
Each brownie contains approximately 220-300 calories, depending on the size you cut them. While it's a treat, portion control is key!
Sugar
With around 18-25 grams of sugar per serving, these brownies satisfy your sweet tooth but be mindful of your overall intake.
Saturated Fat
Expect about 10 grams of saturated fat in a serving. Rich butter and chocolate contribute to that luscious texture, so it's a worthy indulgence on occasion!
These brownies are a delightful treat packed with flavor. For a healthier option, consider swapping in whole wheat flour or reducing the sugar slightly. Want more information? Explore the American Heart Association for insights on sugar consumption!
FAQs about Red Velvet Brownies
Can I use a different type of food coloring?
Absolutely! While classic red food coloring gives Red Velvet Brownies their signature look, you can experiment with other colors for a fun twist. Gel food coloring is a great alternative, as it provides vibrant hues without altering the brownie’s consistency. Just remember to adjust the amount to achieve your desired shade!
How can I store leftover brownies?
To keep your Red Velvet Brownies fresh and delicious, store them in an airtight container at room temperature for up to four days. If you want to keep them longer, they freeze beautifully! Just wrap the brownies individually in plastic wrap or foil, then place them in a freezer-safe container. They’ll last for about three months—perfect for indulgent cravings!
What’s the best way to cut brownies for serving?
For clean cuts, let your brownies cool completely (at least an hour) before slicing. Use a sharp knife dipped in warm water for a smooth cut. Wipe the blade after each slice to maintain an even edge. This method will ensure your Red Velvet Brownies look as good as they taste!
Conclusion on Red Velvet Brownies
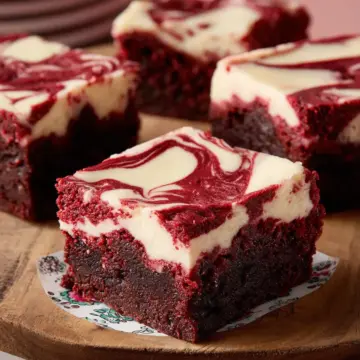
In summary, Red Velvet Brownies are an enchanting blend of rich chocolate and creamy cheesecake that will elevate any occasion. Their vibrant hue and decadent flavor will leave your friends and family asking for seconds. Don’t hesitate to share your creations—these brownies deserve to be celebrated!
Red Velvet Brownies
Equipment
- oven
- large saucepan
- Stand Mixer
- spatula
- baking pan
- Whisk
Ingredients
Batter
- 8 oz bittersweet chocolate bars, chopped
- 1.5 cups granulated sugar, divided
- 1 cup packed light brown sugar
- 1 cup unsalted butter, cubed
- 0.25 cup unsweetened cocoa powder
- 6 large eggs, room temperature, divided
- 1 oz bottle red food coloring
- 1 tablespoon vanilla extract, divided
- 1.75 cups all-purpose flour, divided
- 0.5 teaspoon kosher salt
- 1 cup white chocolate chips
Cheesecake Layer
- 12 oz cream cheese, softened
- 0.33 cup sour cream, room temperature
Instructions
Directions
- Preheat the oven to 325°F. Spray a 13-by-9-inch baking pan with cooking spray. Line the pan with parchment paper, leaving 2 inches on the long sides. Spray the parchment paper with cooking spray.
- In a large saucepan over medium-low heat, combine the bittersweet chocolate, 1 cup granulated sugar, brown sugar, and butter, stirring until the chocolate is melted, about 3 minutes. Remove from the heat and whisk in the cocoa powder until smooth. Let cool slightly, about 15 minutes.
- Whisking constantly, add 5 of the eggs, one at a time, mixing until fully incorporated after each addition. Whisk in the red food coloring and 1 tablespoon vanilla. Fold in 1 ¾ cups flour and the salt, stirring until completely smooth. In a small bowl, set aside ½ cup of the brownie batter. Fold the white chocolate chips into the remaining batter.
- Spoon the remaining batter into the prepared pan, using a spatula to spread it into an even layer.
- Meanwhile, in a stand mixer fitted with the paddle attachment or in a large bowl using an electric mixer, beat the cream cheese, the remaining ½ cup granulated sugar, and the remaining 2 teaspoons vanilla at medium speed until fully combined and creamy, 1 to 2 minutes. Scrape the bottom and sides of the bowl. Beat in the sour cream and the remaining egg, mixing until fully combined, 30 seconds to 1 minute. Beat in the remaining 2 tablespoons of flour until just combined.
- Carefully dollop the cheesecake mixture all over the brownie layer; gently spread into a smooth layer. Dollop the reserved ½ cup brownie mixture by the teaspoonful randomly over the top of the cheesecake batter in the pan. Using a toothpick, skewer, or paring knife, swirl the brownie mixture into the cheesecake mixture, being careful not to press too deep to disturb the brownie layer.
- Bake until a wooden pick inserted in the center comes out clean (a few crumbs attached are OK), 50 to 55 minutes. Cool on a wire rack for 1 hour, then refrigerate for an additional hour before cutting and serving.

Leave a Reply