
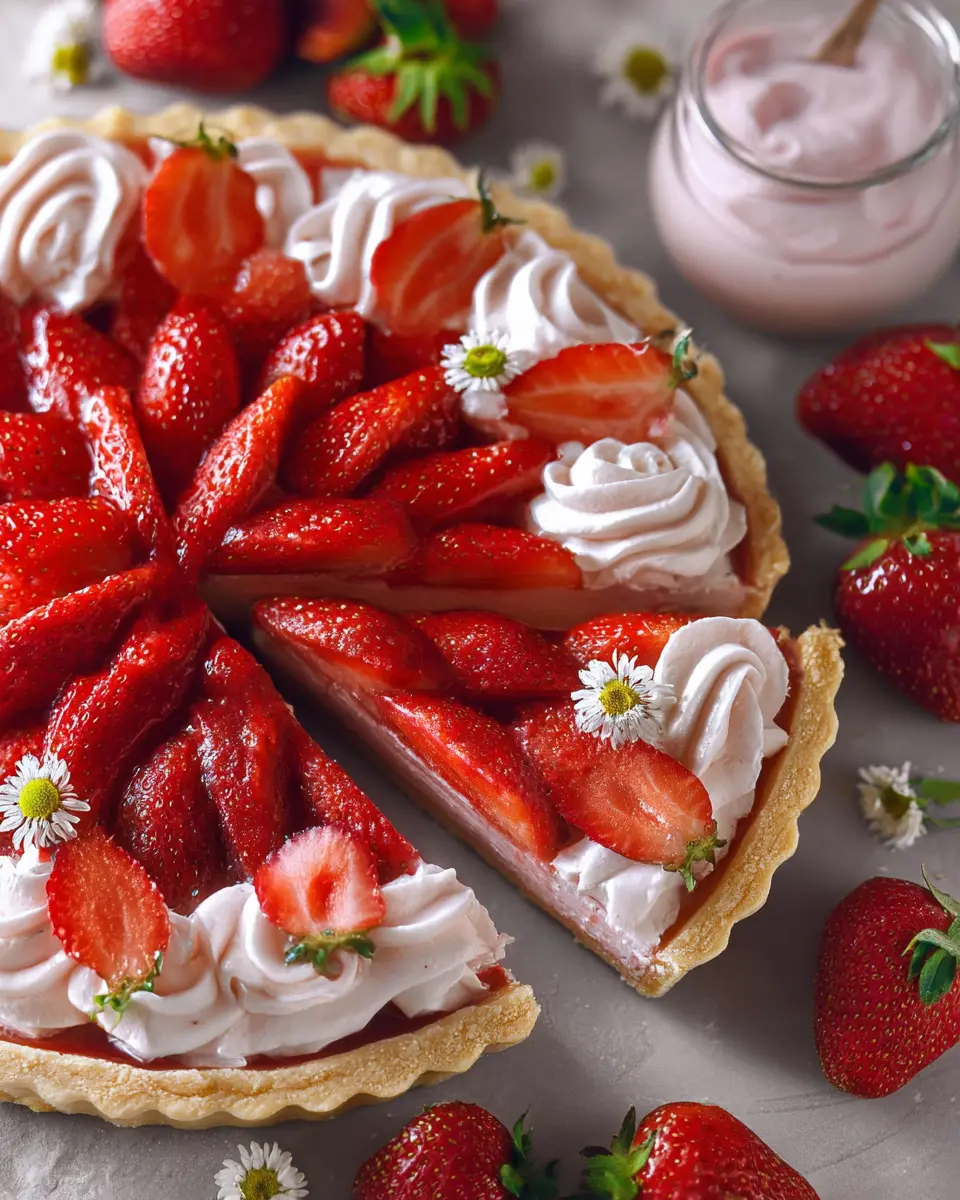
Introduction to Whipped Strawberry Tart
The Love for Homemade Desserts
When was the last time you indulged in a homemade dessert? There’s something magical about creating sweets from scratch—especially when it involves fresh strawberries. A whipped strawberry tart captures that homemade spirit beautifully, transforming luscious strawberries into a delightful filling atop a buttery crust.
Making desserts at home allows you to control the ingredients, offering a personal touch that store-bought options simply can't match. Plus, the joy of serving something you've crafted with your own hands is a feeling like no other.
This whipped strawberry tart is perfect for warmer days, offering a refreshing and light treat that’s sure to impress your friends or family. Imagine slicing into that beautiful tart, revealing layers of creamy strawberry goodness. Not to mention, the vibrant pink color is a feast for the eyes as well!
If you're eager to hone your baking skills or impress a loved one, this tart is an excellent way to start. It combines simple ingredients with straightforward steps, making it accessible for both novice and seasoned bakers. Let’s dive into this delicious recipe that embodies the joy of homemade desserts.
For more tips on dessert-making techniques, check out Taste of Home and Serious Eats.
Ingredients for Whipped Strawberry Tart
Creating a delicious whipped strawberry tart starts with two essential components: the tart crust and the luscious whipped filling. Here’s what you’ll need to whip up this delightful dessert.
Tart Crust
For the perfect base, you'll require:
- ½ cup unsalted butter (room temperature)
- ½ cup sugar
- 1 teaspoon vanilla extract
- 1 large egg (room temperature)
- 1 ¾ cups all-purpose flour
- ½ teaspoon salt
The buttery and slightly sweet crust complements the strawberry filling beautifully.
Whipped Strawberry Filling
Now, let’s focus on that irresistible filling. Gather these ingredients:
- 400 g fresh strawberries, quartered (about 2 ½ cups)
- ½ cup water (or your favorite non-alcoholic alternative)
- ¾ cup sugar
- 2 teaspoon unflavored gelatin
- 1 tablespoon cornstarch
- 1 tablespoon water
- 4 oz cream cheese (room temperature)
- 1 ½ cups heavy cream
With these components, you're all set for a delightful blend of flavors in your whipped strawberry tart. If you're interested in tips for selecting the freshest strawberries, check out this handy guide. Happy baking!
Step-by-Step Preparation of Whipped Strawberry Tart
Creating a delightful whipped strawberry tart from scratch is a rewarding experience that not only elevates your dessert game but also impresses your friends! Below, you’ll find detailed instructions to guide you through the process seamlessly.
Making the tart crust
Start by preparing your tart crust, which serves as the sturdy foundation for our delicious filling. In a mixing bowl, cream together ½ cup of unsalted butter and ½ cup of sugar until light and fluffy. This usually takes around 4-5 minutes at medium speed using an electric mixer. Add in 1 large egg and 1 teaspoon of vanilla extract, mixing until everything is well-combined. Gradually fold in 1 ¾ cups of all-purpose flour and ½ teaspoon of salt until a soft dough forms.
Now, turn the dough out onto a lightly floured surface. To prevent cracking, use your hands to fraisage the dough a few times before shaping it into a disc and wrapping it in plastic wrap. Pop it in the fridge for at least an hour; this helps to develop the flavors and make rolling easier.
Pre-baking the tart shell
While your dough chills, preheat your oven to 350°F (175°C). After chilling, roll the dough out to about ¼ inch thickness on a floured surface, then transfer it to your lightly greased 9-inch tart pan. Trim any excess dough and use a fork to dock the bottom to prevent bubbling while baking. Chill the prepared tart shell for another 30 minutes before baking it.
To par-bake it, line the tart with parchment paper and fill with pie weights or dried beans. Bake for 20 minutes, then allow it to cool while you prepare the filling.
Preparing the strawberry filling
For the luscious strawberry filling, start by blending 400 g of fresh strawberries with ½ cup of water to create a puree. Next, transfer it to a saucepan, adding ¾ cup of sugar and 2 teaspoon of unflavored gelatin. Heat over medium, stirring until dissolved. Combine 1 tablespoon of cornstarch with 1 tablespoon of water, then add this to the mixture until thickened. Once cooled, this mixture will be the heart of our whipped strawberry tart.
Assembling the tart
Once your tart shell is cooled, start layering! Spoon half of the strawberry mixture into the crust, spreading it evenly. Chill this layer in the fridge for about 30 minutes. While it sets, whip 4 oz of room-temperature cream cheese with a stand mixer until smooth, then gradually add 1 ½ cups of heavy cream until stiff peaks form. Fold in the remaining strawberry mixture for an irresistible filling. Spoon this delightful mixture over the chilled layer in the tart shell.
Chilling and serving the tart
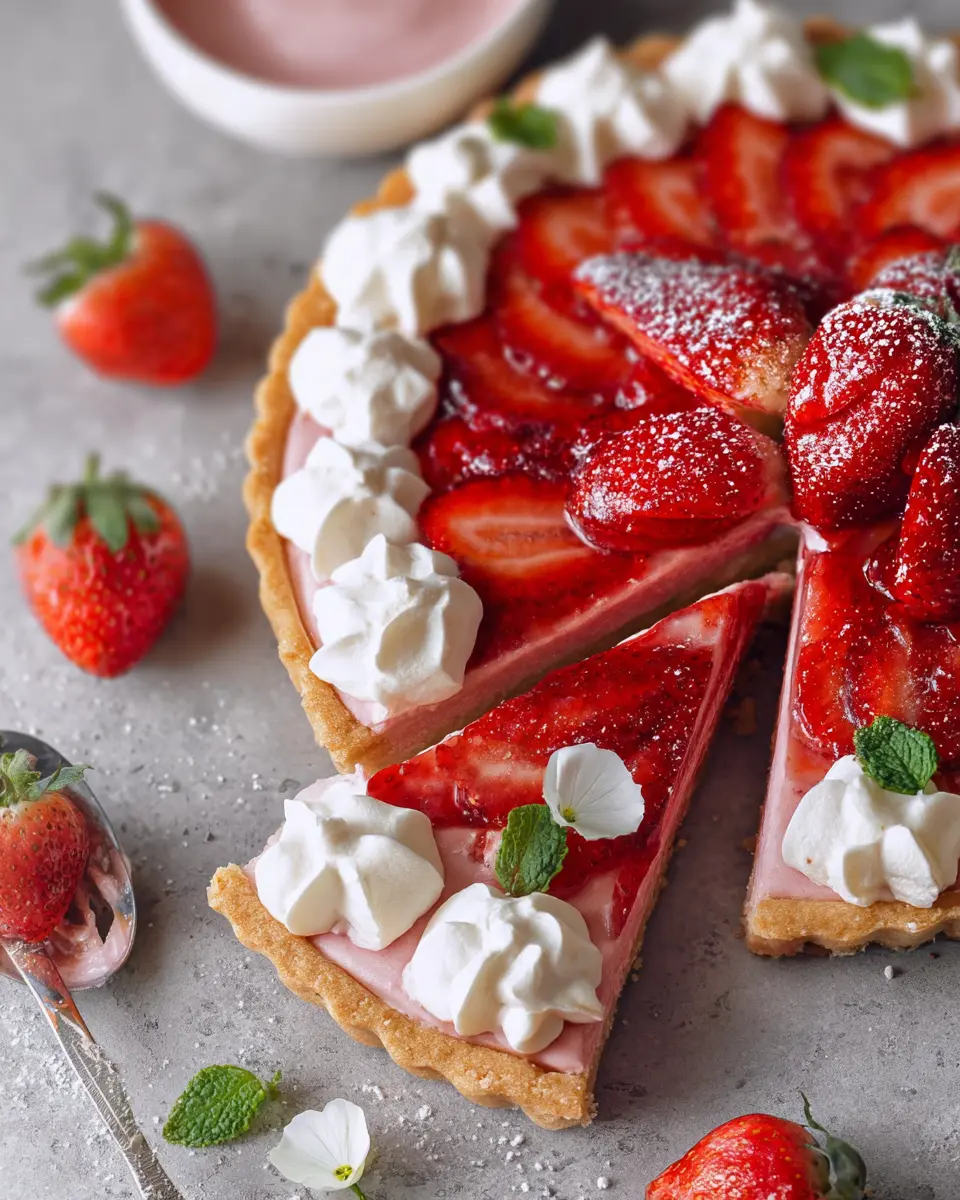
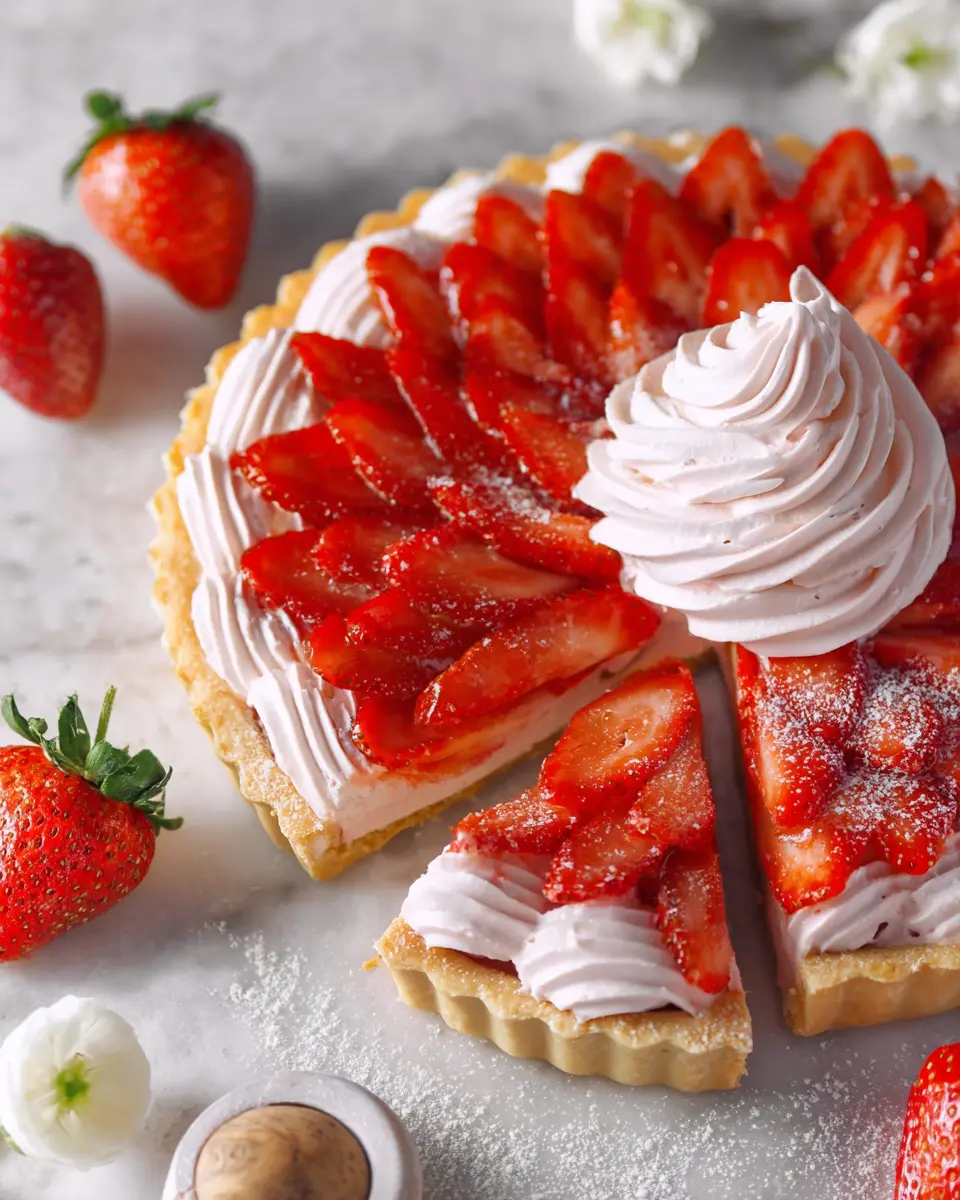
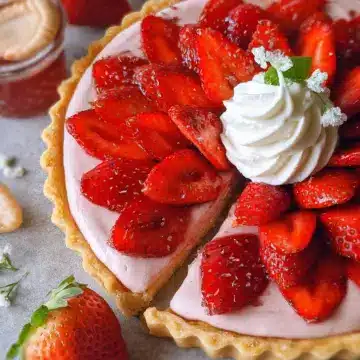
To let those flavors meld beautifully, chill the assembled tart in the fridge for 2-3 hours (or longer if you can hold off!). When it’s finally time to savor your creation, consider garnishing with fresh strawberries, pineberries, or even a dollop of whipped cream to elevate its presentation. Store any leftovers in the refrigerator as this tart is best served chilled!
For tips on how to choose the freshest strawberries, head over to resources such as the California Strawberry Commission. Happy baking!
Variations of Whipped Strawberry Tart
Adding Different Fruits
While the classic whipped strawberry tart is delightful, consider experimenting by adding other fruits. Ripe peaches, blueberries, or raspberries can elevate the tart's flavor profile. Simply replace the strawberries with your chosen fruit, following the same method for puree. For a fun twist, try a mixed berry tart—use a combination of strawberries and blackberries for a burst of color and flavor!
Using Alternative Sweeteners
If you’re looking for a healthier option, swap out refined sugar for natural alternatives like honey, maple syrup, or agave nectar. Adjust the quantity to taste, as these sweeteners may be sweeter than sugar. Just remember, whisking in these alternatives may slightly alter the texture, so experiment to find your perfect balance!
Cooking Tips and Notes for Whipped Strawberry Tart
Importance of ingredients' temperature
Using room temperature ingredients, especially butter, eggs, and cream cheese, is essential in achieving a perfect whipped strawberry tart. Room temperature butter blends more smoothly with sugar, resulting in a lighter crust. Likewise, warmed cream cheese integrates seamlessly into your whipped filling, ensuring no lumps. For best results, take these ingredients out of the fridge about 30 minutes before you start.
Keeping the crust intact
A beautifully intact crust is key to a stunning whipped strawberry tart. After rolling out your dough, make sure to chill it again before baking to prevent shrinkage. Be gentle when transferring the crust to your tart pan, and don't forget to dock it with a fork before par-baking! This helps release any steam, keeping your crust crispy. Want more crust tips? Check out this guide on tart crusts for helpful techniques!
Serving Suggestions for Whipped Strawberry Tart
Garnishing Ideas
Elevate your whipped strawberry tart with delightful garnishes. Fresh mint leaves add a burst of color and freshness, while a drizzle of honey or balsamic reduction can bring a sour-sweet balance. Consider topping it with dollops of additional whipped cream and colorful edible flowers for a whimsical touch.
Pairing Suggestions
This tart makes for a stunning centerpiece, but it can also be paired with complementary sides. Serve it alongside a simple arugula salad tossed in a light vinaigrette, or offer a scoop of refreshing vanilla ice cream. For an extra zing, consider a homemade berry compote or citrus sorbet to brighten each bite.
Looking for more dessert ideas? Check out Fine Cooking for inspiration!
Time Breakdown for Whipped Strawberry Tart
Preparation time
Start your culinary adventure with 35 minutes for preparation. This involves whipping up your tart crust and preparing a luscious strawberry filling.
Cooking time
While it’s tempting to think of cooking as the main event, you’ll only need 20 minutes for baking the tart shell to get that beautiful golden hue.
Chill time
Patience is key! Allow the tart to chill for a total of 3 hours to ensure every layer sets perfectly for a delightful experience. This time will lead to a beautifully firm texture and a burst of fresh strawberry flavor in every bite.
For expert tips on creating the perfect crust, check out this source for invaluable advice!
Nutritional Facts for Whipped Strawberry Tart
Calories
Each slice of this delightful whipped strawberry tart contains approximately 350 calories, making it a perfect treat for special occasions without overwhelming your daily intake.
Protein
Packed with creamy goodness, this tart offers around 5 grams of protein per serving, thanks to the inclusion of cream cheese and heavy cream.
Sugar Content
The sweetness of fresh strawberries shines through, contributing to a sugar content of about 25 grams per slice. Keep in mind that using less sugar is an option if you're watching your sugar intake!
For more detailed nutritional information, consider visiting Healthline to explore ways to modify recipes for healthier eating!
FAQs about Whipped Strawberry Tart
How can I make the tart crust gluten-free?
To make a gluten-free tart crust for your whipped strawberry tart, you can easily substitute the all-purpose flour with a gluten-free blend. Look for a one-to-one gluten-free flour mix that includes xanthan gum, as it helps mimic the texture of traditional flour. The process remains the same—just follow the original recipe instructions to create that delightful crust without gluten.
Can I make this dessert in advance?
Absolutely! In fact, making your whipped strawberry tart a day ahead can enhance the flavors. Just assemble the tart up to the chilling step and store it covered in the refrigerator. This allows the filling to set properly and the flavors to meld beautifully, resulting in a more delicious dessert when you serve it.
What’s the best way to store leftovers?
To keep your leftovers fresh, store any remaining whipped strawberry tart in an airtight container in the refrigerator. It’s best enjoyed within a few days for optimal flavor and texture. If you find yourself with extra strawberries, consider adding them on top just before serving for that fresh look! For more storage tips, check out this expert guide.
Conclusion on Whipped Strawberry Tart
In conclusion, the whipped strawberry tart is a delightful dessert that perfectly captures the essence of fresh strawberries. With a creamy filling and a buttery crust, it makes for an impressive treat for any occasion. Enjoy making and sharing this beautiful tart with friends and family!
Whipped Strawberry Tart
Equipment
- 9-inch tart pan
- blender
- Stand Mixer
- Offset Spatula
- medium saucepan
Ingredients
Tart Crust
- ½ cup unsalted butter room temperature
- ½ cup sugar
- 1 teaspoon vanilla extract
- 1 large egg room temperature
- 1 ¾ cups all-purpose flour
- ½ teaspoon salt
Whipped Strawberry Filling
- 400 g fresh strawberries quartered (about 2 ½ cups)
- ½ cup water or your favorite rosé
- ¾ cup sugar
- 2 teaspoon unflavored gelatin
- 1 tablespoon cornstarch
- 1 tablespoon water
- 4 oz cream cheese room temperature
- 1 ½ cups heavy cream
Instructions
To make the crust
- Cream butter and sugar on medium speed for 4-5 minutes. Add egg and vanilla. Mix until combined. Add flour and salt; mix until incorporated and a soft dough forms.
- Turn out dough on a lightly floured surface. Using the heel of your hand, fraisage the dough several times to help prevent the dough from cracking and feathering when you roll it out. Form dough into a disc and wrap in plastic wrap. Chill in the fridge for at least 1 to 2 hours, or overnight.
- Preheat oven to 350° and lightly spray a 9-inch tart pan with baking spray.
- On a lightly floured surface, roll out the tart dough to about ¼” thickness. Use the rolling pin to roll up the dough and transfer to the prepared tart pan. Arrange the dough in the pan and trim away access. Use a fork to dock the bottom of the tart dough. Let the tart dough chill again in the fridge for 30 minutes to 1 hour.
- To par bake the tart shell, place the tart pan on a sheet pan. Then lay a sheet of parchment over the tart pan and fill with pie weights, dried beans, or uncooked rice. Bake for 20 minutes. Remove from the oven and allow parchment and weights to cool enough to remove them easily.
To make the filling
- Add strawberries and water to a blender; puree until smooth. You should have about 2 cups of puree. Pour puree into a small saucepan over medium heat. Add the sugar and gelatin and stir until both are dissolved.
- Stir together cornstarch and water and add to the strawberry mixture. Cook, stirring continuously, for a couple more minutes, until mixture has thickened and evenly coats the back of a spoon. You should end up with about 1 ½ cups of the strawberry mixture. Place in the fridge for an hour to cool or until completely cool.
- Spoon half of the strawberry mixture (about ¾ cup) into the prepared tart crust and spread evenly. Chill in the refrigerator.
- In the bowl of a stand mixer with the whisk attachment, add cream cheese and whip on high speed until smooth and creamy. Add about ¼ cup of the cream, and mix on high speed until incorporated. Scrape the sides of the bowl and repeat, adding a little bit of cream at a time until completely incorporated with the cream cheese. Then mix on high speed until stiff peaks form.
- Add the remaining strawberry mixture (about ¾ cup) to the whipped cream and whip on high speed again until stiff peaks form. Spoon whipped filling over the strawberry layer in the tart crust and smooth with an offset spatula. Return to the refrigerator until thoroughly chilled, about 2-3 hours or overnight.
- When ready to serve, garnish with fresh strawberries, pineberries, meringue cookies, or additional whipped cream if desired.
- Store covered in the refrigerator.


Leave a Reply